
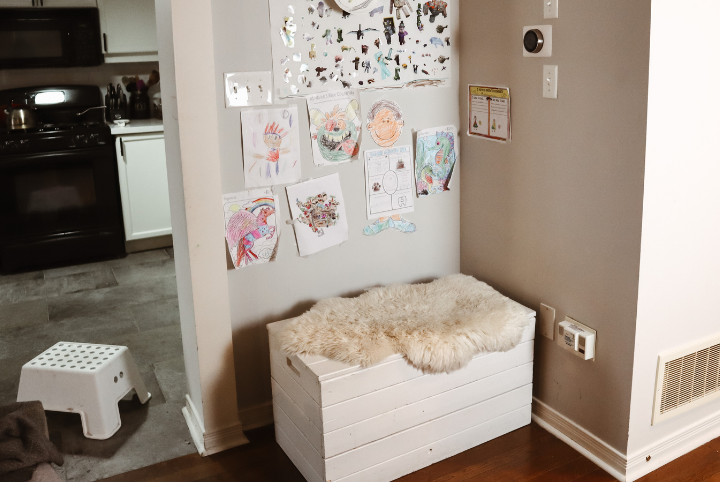
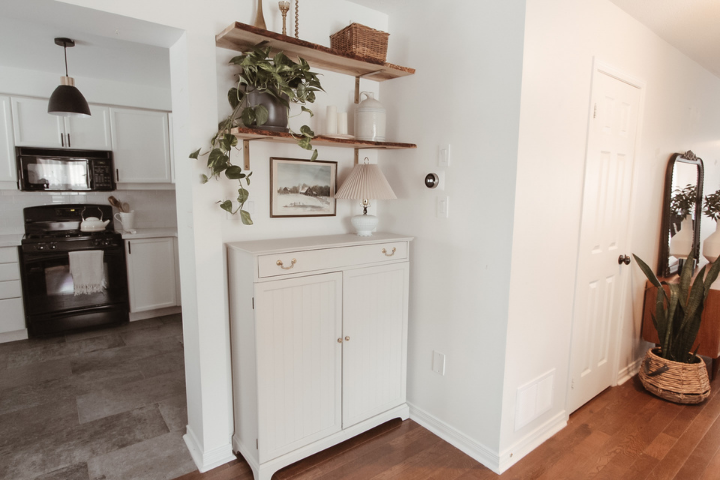
We had a corner of our living room that was seriously stressing me out. From the broken trunk to the walls that I let my kids run away with, this little space was a breeding ground for collecting clutter.
I was determined to transform this little niche into something that would not only be beautiful, but also function as a useful storage space.
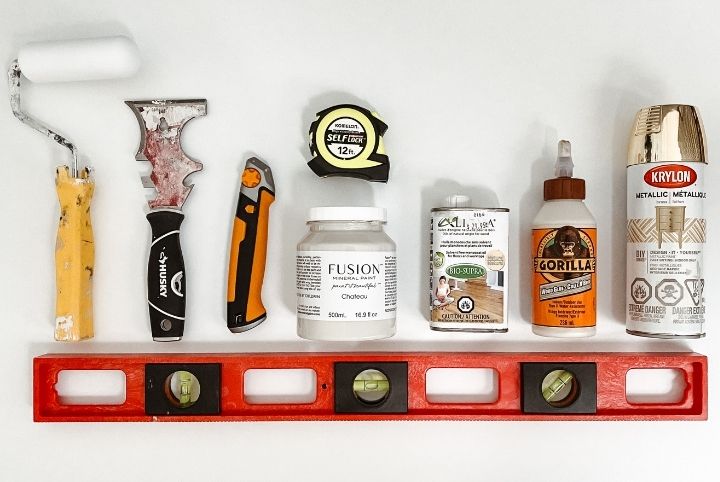
Materials Required:
- Thrifted cabinet
- Beadboard paneling
- Wood glue
- Fusion Mineral Paint – Chateau
- Paint brush
- Foam paint roller
- Brass spray paint
- 8′ live edge wood slab
- Monocoat oil
- L brackets
- Utility knife
- Multi-tool
- Level
- Tape measure
Tools Required:
- Edge guide
- Circular saw
- Brad nailer
- Sander
- Drill
STEP 1: REPLACE GLASS ON CABINET
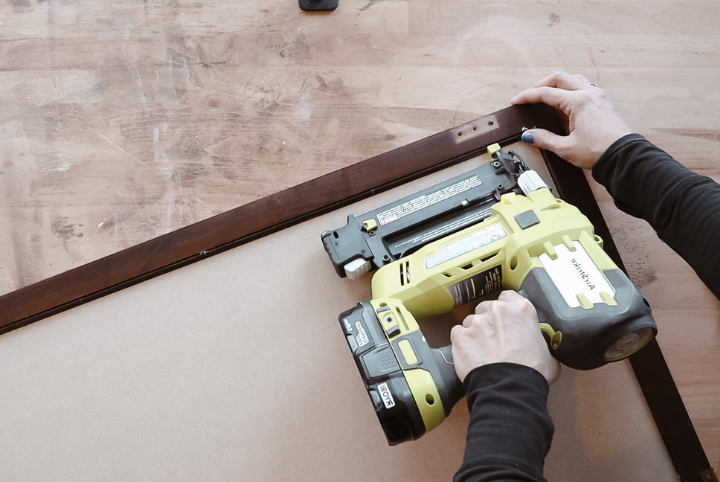
I found a cabinet that was the perfect size for my space, but needed a bit of an update. I wanted to conceal the items stored in this cabinet. So, for a simple transformation, I carefully removed the glass inserts and replaced them with beadboard panelling cut to the size of the opening. I used my brad nailer to secure the panels to the back of the doors.
Step 2: PREP & PAINT
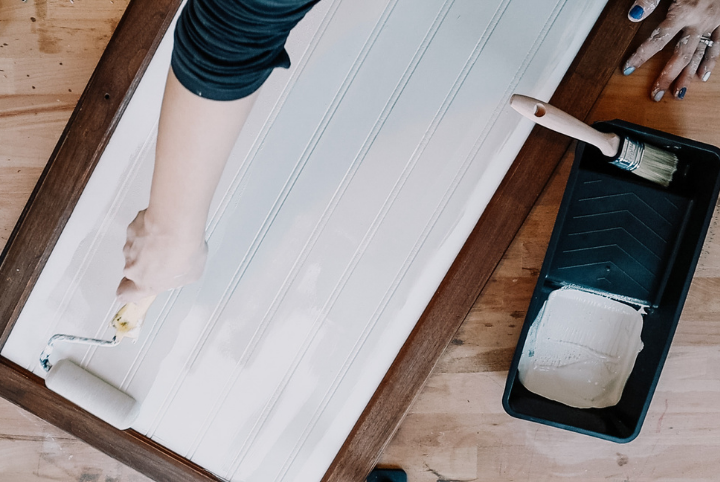
I sanded the cabinet with 120 grit sandpaper. Then, I used a small foam paint roller to apply two layers of Fusion Mineral Paint in the shade Chateau. I cleaned up the original hardware using a toothbrush to scrub with some Bar Keepers Friends and some water.
STEP 3: LIVE EDGE PREP
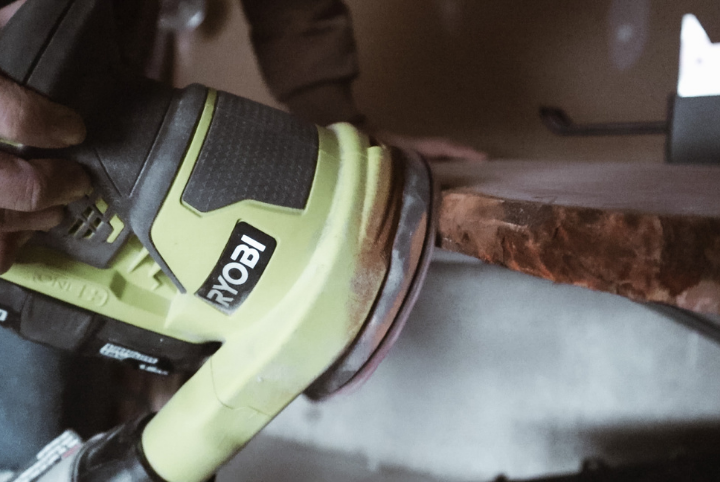
Starting with a large 8-foot piece of live edge wood, I removed the bark using a utility knife and handheld multi-tool. Some pieces fell off easily but there were sections that required a bit of force. Removing the bark ensures easy installation as the wood will sit flush against the wall. However, for the side facing outwards, you may choose to leave the bark on if this is the look you like better.
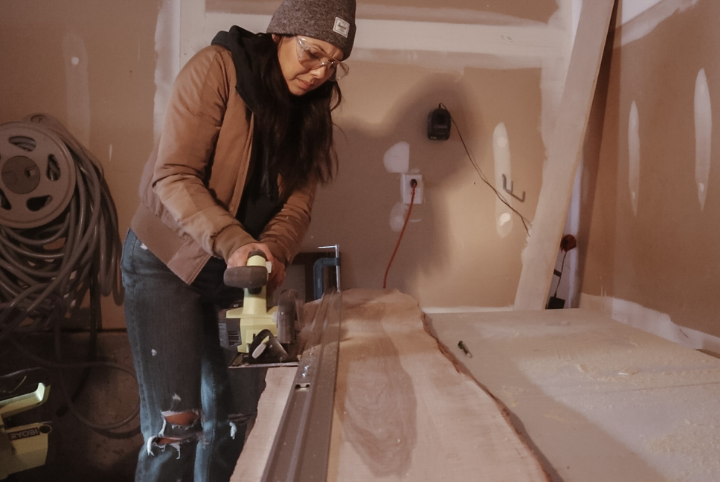
At this point I needed to decide which “live edge” I wanted to keep, and which side I was going to cut down to lie flush against the wall. I decided to get rid of the flatter side of the board, leaving the side with more curves and details for the fronts of my shelves. I used a circular saw and an edge guide to cut as little as possible off of the edge of the board.
Then, I cut my board down to the size I needed for the two shelves (42″ for my space) and used my random orbital sander to smooth down any of the rough edges. I applied one coat of a colourless Monocoat Oil to seal and protect the wood.
STEP 4: SHELF HARDWARE
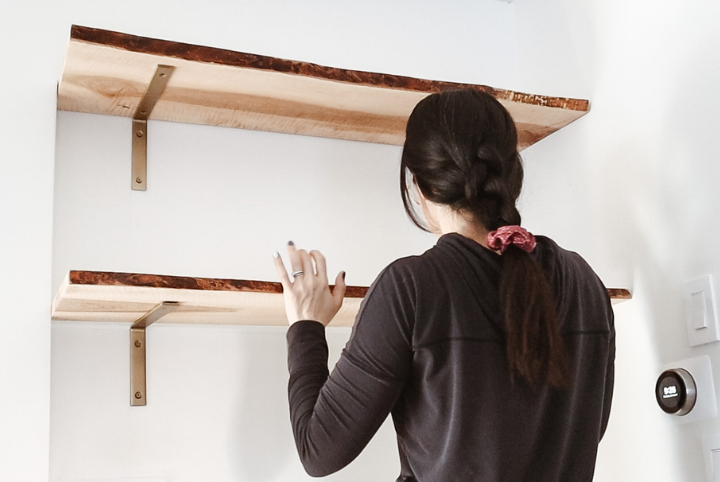
I found some simple L brackets to install the shelves and decided to spray paint them with brass spray paint so that they would blend into the shelves, rather than be a focal point. Don’t forget to spray the screws as well!
I installed them high up, right below a small inset in my wall. Installing them here almost completely camouflaged the inset and helps to draw the eye upward, creating the illusion of higher ceilings.
STEP 5: PLACE & INSTALL BOARDS
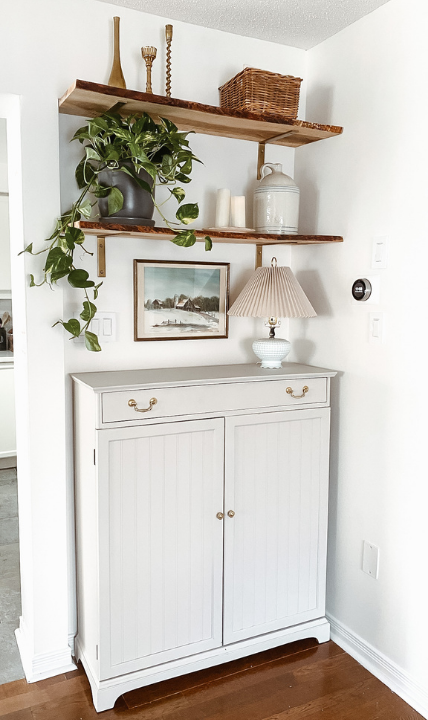
I installed my shelf boards, but not before considering the live edge design. I liked the idea of having a slightly smaller shelf on the top, with the wider one below. The cabinet fit perfectly underneath for a mini transformation that really hit the mark for me!
This corner makes me feel so calm and happy every time I see it. The hidden storage and the beautiful live edge shelves are exactly what this space needed.
BEFORE & AFTER:
To watch Courtney’s DIY live edge shelves project start to finish, check out the video below:

