
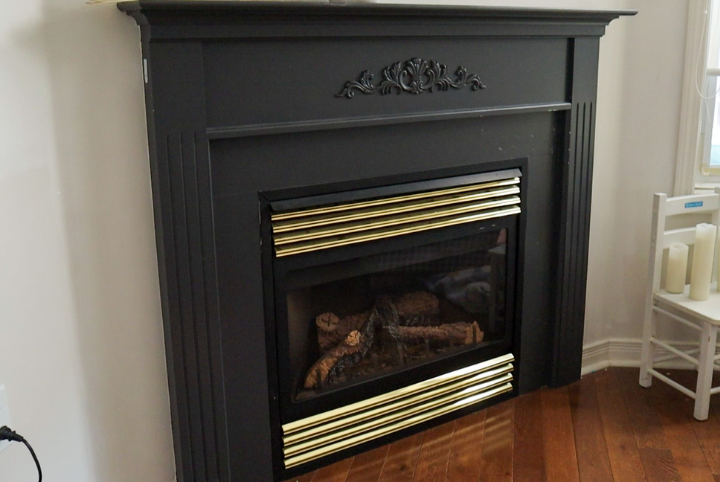
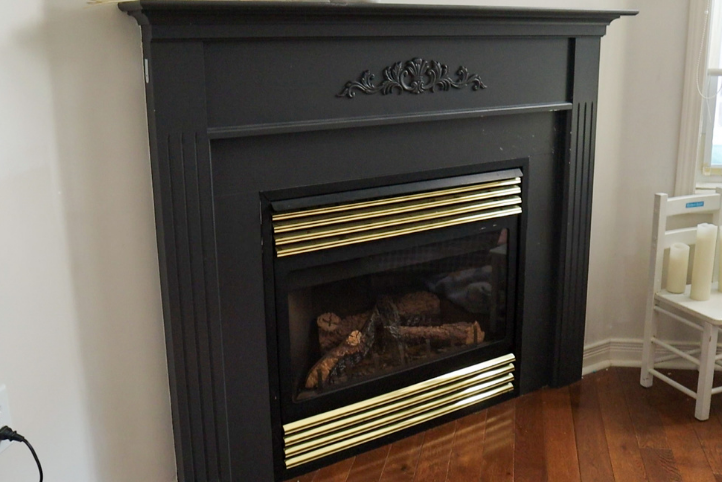
While there was nothing inherently wrong with the original, builder-grade fireplace installed in my home, it really didn’t say anything about my personal style. So, I decided to kick it up a notch and create the fireplace mantle of my dreams by myself! This DIY transformation didn’t take too much more than a few pieces of wood and my trusty power tools…
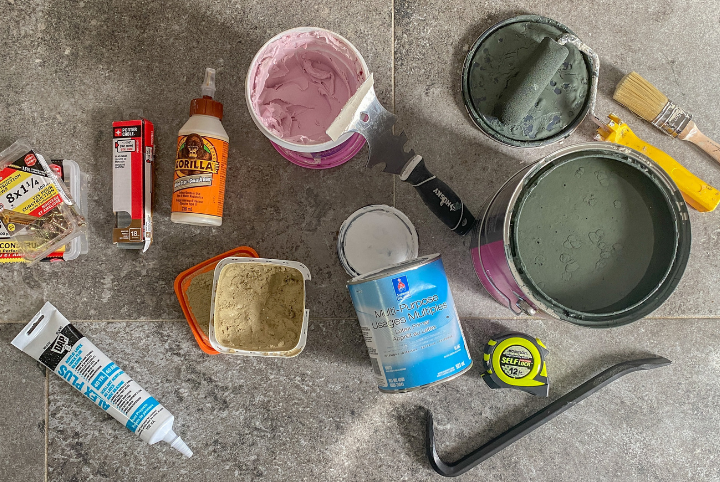
Materials Needed:
- 1×10 pine board (or MDF)
- 1×12 pine board (or MDF)
- 1×4 pine board (or MDF)
- 2×4 scraps
- 4″ pre-primed trim
- 3″ pre-primed trim
- Stain blocking primer
- Paint
- Caulk
- Wood filler
- Spackle
- 1 1/4″ brad nails
- 3″ and 1¼” construction screws
Tools Required:
- Mitre saw
- Drill/driver
- Brad nailer
- Sander
- Crow bar
- Handheld multi-tool
- Level
- Tape measure
- Paint brush
- Foam roller
STEP 1: DEMOLITION
I removed the original mantle by prying it away from the wall with my little crow bar. It came off super easily in one piece and I was ready to build!
Step 2: THE FACE
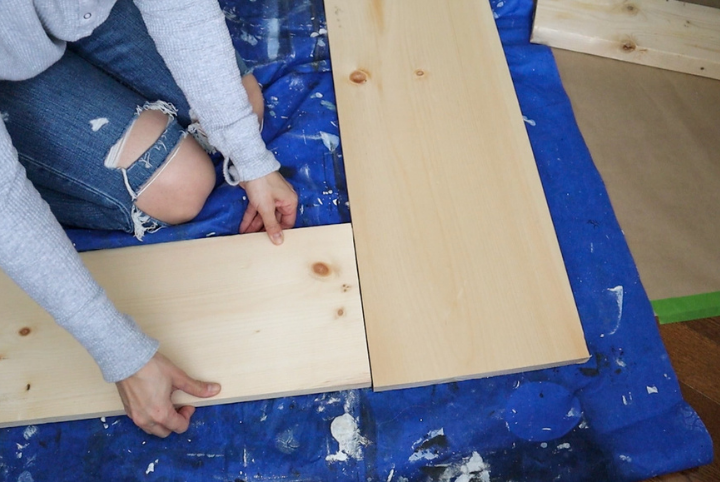
I started with building the face of the mantle first. I used a 1×12 board for the top portion and 1×10 boards for the two legs, making sure that my lengths matched up with the measurements of my existing gas fireplace. I used pocket hole screws to secure the legs to the top of the mantle. I found that these joints also needed some reinforcement, so I whipped up a bracket with a piece of scrap wood and some screws.
STEP 3: THE SIDES
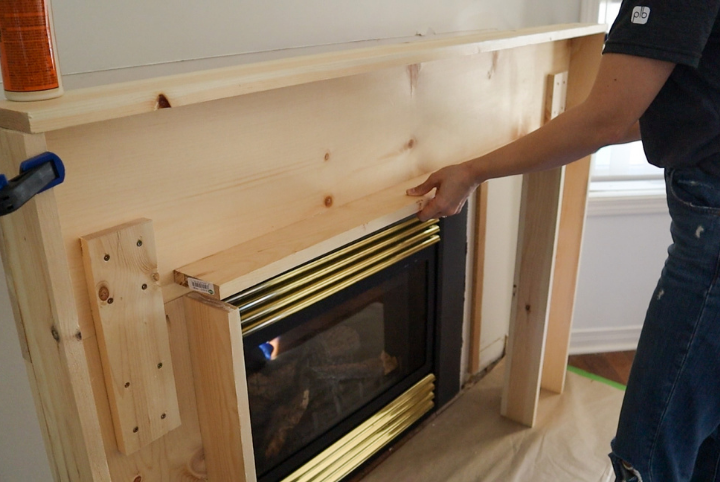
So, the mantle is already starting to take shape, but at this point I needed to frame out the edges so that it would stand out from the wall (nobody wants a pancake mantle!). I attached 1×4 boards around the perimeter of the back of the mantle face using wood glue and my trusty brad nailer. I made sure all of my measurements were super accurate and I took my time lining up the boards so that I could get a super smooth end product.
STEP 4: DETAILS

I wanted the mantle to stand out, just a little bit, with some simple detail. I used some pre-primed trim around the outer and inner edges of the face of the mantle. I cut the corners at 45 degrees for a more polished end result, and I applied wood glue to the trim before nailing them into place.
STEP 5: INSTALL
To attach the mantle to my wall, I used 3″ construction screws to attach some 2×4 boards to the studs in the wall. Then I lifted the mantle onto the wall and nailed it directly to these supports.
STEP 6: FINISHING
My goal was to make this build look like it was all one piece, almost as if it were cast out of plaster.
I started by filling all the nail holes and gaps with wood filler. I let it dry, and then sanded it smooth. I did this process two times, making sure every edge and join was super smooth. For a final touch, I used a couple thin layers of spackle to really smooth out the trim joins, sanding between each layer.
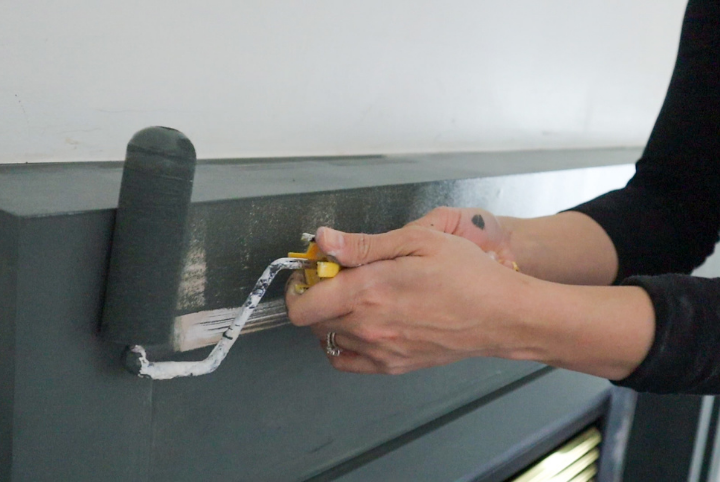
I used a stain blocking primer over the entire mantle and then went in a beautiful dark green-grey paint called The Hammer by Digby Paints.
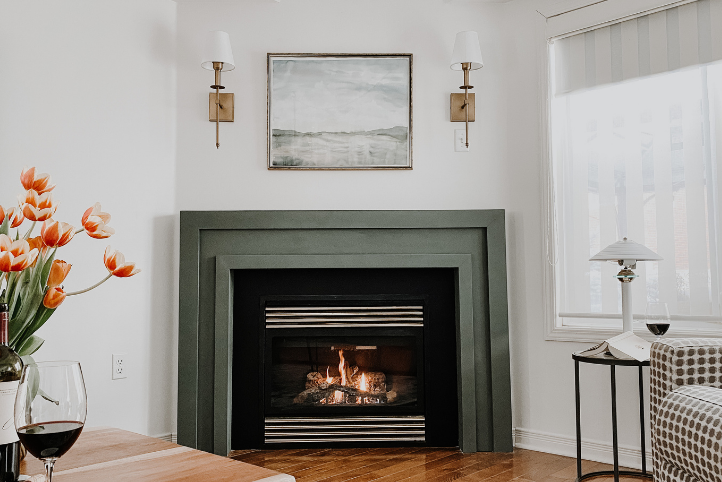
For styling, I placed two wall sconces (with puck lights for simple installation) above the finished fireplace to add symmetry, and a thrifted picture frame with a simple watercolour to tie in the colours. Mixing old and new items creates a layered space with personality and texture.

The end result created quite a dramatic transformation in my living room. This corner used to fade away in the back corner of this room, but has now become a focal point that I will love for years to come.
BEFORE & AFTER:
To watch Courtney’s DIY fireplace facelift project start to finish, check out the video below:

