
Preparing a Halloween costume well in advance is not my strong suit. I saw this lipstick costume made for a child last Halloween, and I was dripping with jealousy – so I knew I had to make it for myself! I ordered a roll of corrugated cardboard, sourced items I had lying around the house and set to work. Here’s a step-by-step guide to create this colourful cardboard sensation. You’ll rock Halloween in a flash while looking like you’ve been planning your outfit for months.

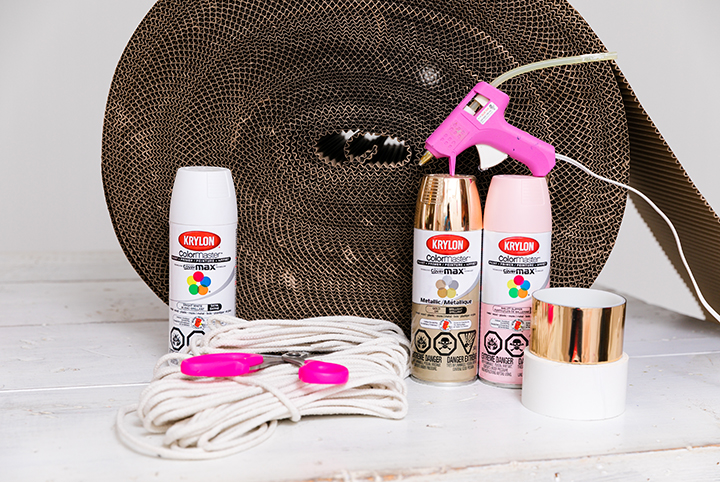
Here’s what you’ll need to make your DIY lipstick costume:
- Big roll of corrugated cardboard
- Gold and/or white duct tape
- Scissors
- Plastic bowl
- Gold, pink and white spray paint
- Optional: white rope to tie yourself into costume
Related: 5 Last-Minute DIY Halloween Costumes That Use Everyday Items.
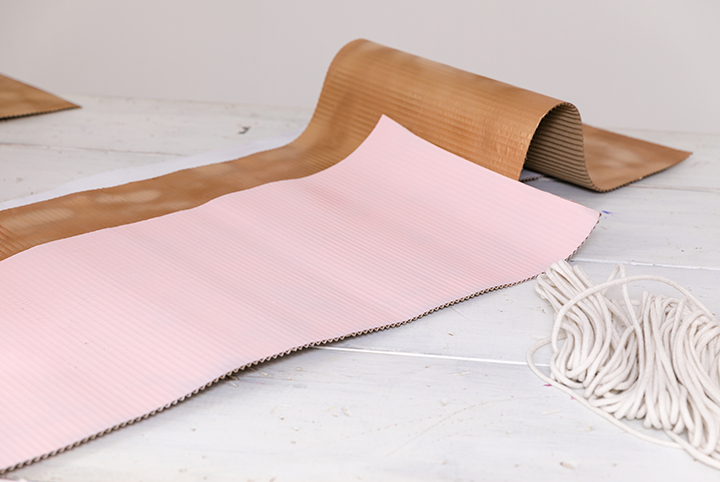
Step One: Cut Cardboard and Spray Paint
Cut the corrugated cardboard into four long strips (two of which you’ll later cut into thinner strips). Spray paint each of the four pieces in various hues. I alternated the white and gold in the body of the lipstick tube, and matched the lipstick colour to the pale pink of my hair. But you can choose whichever hues you prefer! I sprayed two pieces gold, one white and one pale pink.
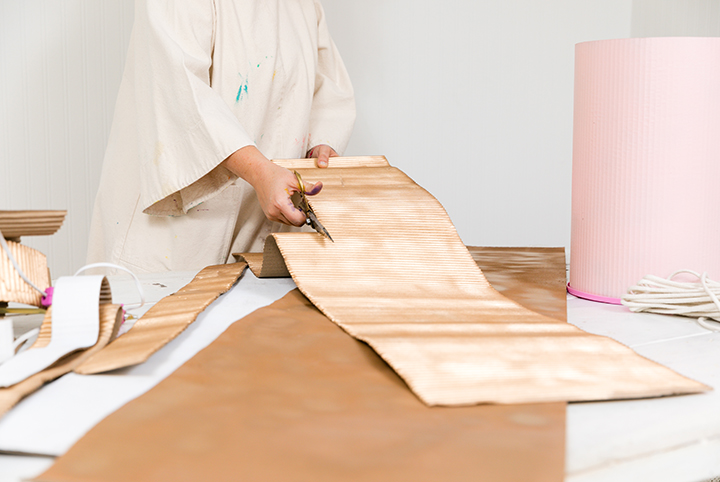
Step Two: Cut Painted Cardboard Into Thinner Strips
Once the spray paint is dry, cut two of the four cardboard pieces into thinner strips (I chose one gold and one white). By doing so, not only will you get the effect of a fancy lipstick tube, but you’ll ensure the “tube” portion of the costume will wrap in a circular shape around your body. Cut the strips to the length you want the body of your lipstick tube to fall.
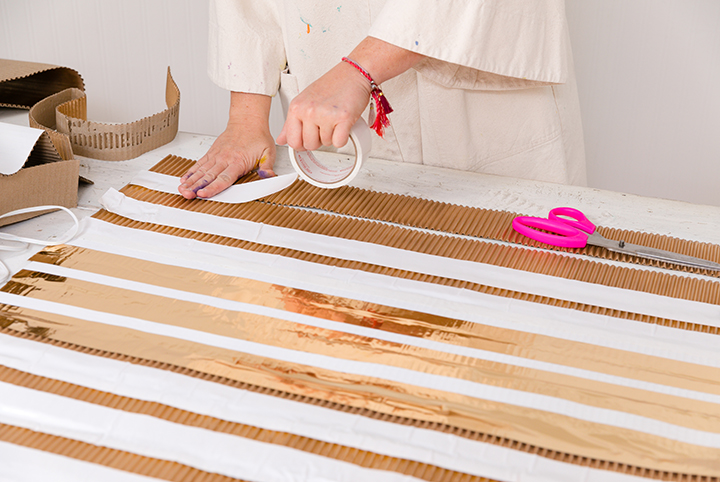
Step Three: Tape the Strips Together
Once your painted cardboard strips are cut to your desired length, tape them together. I alternated three pieces of gold with contrasting white tape, and then switched to white-painted cardboard with gold tape. You can make this all one colour, if you prefer! I just liked the fancy gold and white look.
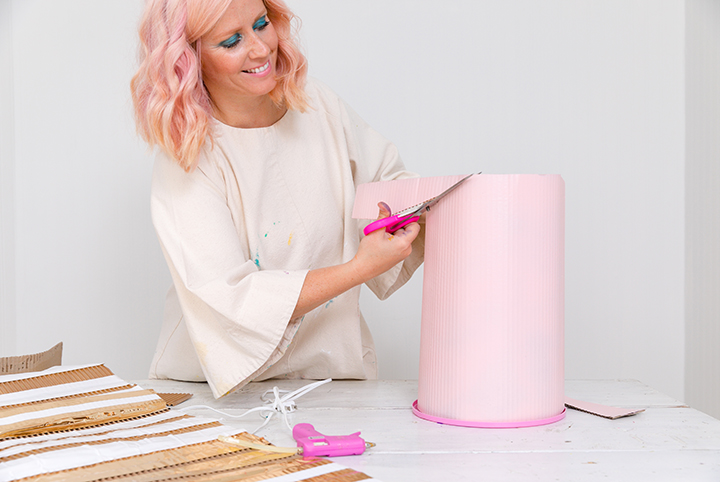
Step Four: Trim the Ends and Create the Tube Top
Once the body of your striped lipstick tube is complete, trim the top and bottom to make sure it’s even. Now it’s time to make your gold “tube” top. Grab your final piece of gold-painted cardboard, and wrap it around the top of your body, then cut it to fit. Do not put this on until you’re ready to walk out the door. I taped mine to my bodysuit with duct tape and it was perfect.
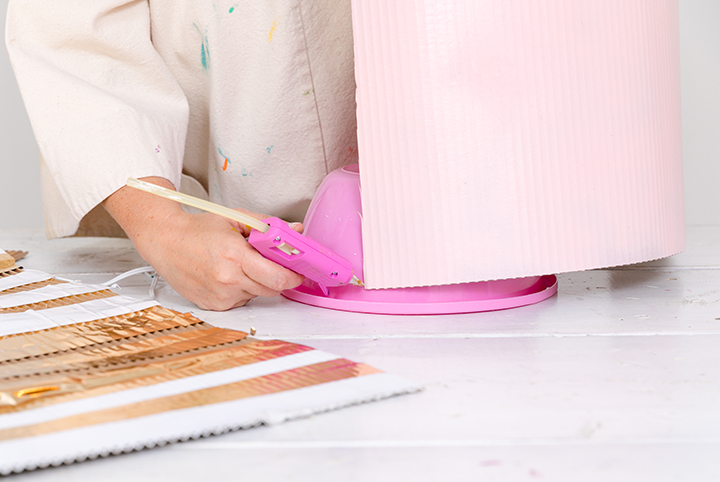
Step Five: Create the Lipstick Hat
It’s time to make your lipstick hat! Grab your cheap plastic bowl and use the lip of the bowl to hot glue the cardboard around it. After gluing, cut the top of the cardboard on an angle to get the natural peak of a lipstick. I did each side separately to make sure I got the angle just right!
Step Six: Show it Off
I had a light-pink bodysuit, so I put that on first to be covered underneath. I also slipped on a fun pair of pink pumps to polish off the look. Once you’re ready to walk out the door, have your friend tape you into your costume. You can tie it at the back to take it off and on – I chose to have mine taped so there were no seams. Duct tape holds like nothing else! I taped the gold cardboard “tube top” on first, followed by the larger tube. The bowl fit my head perfectly, and I was ready to go!
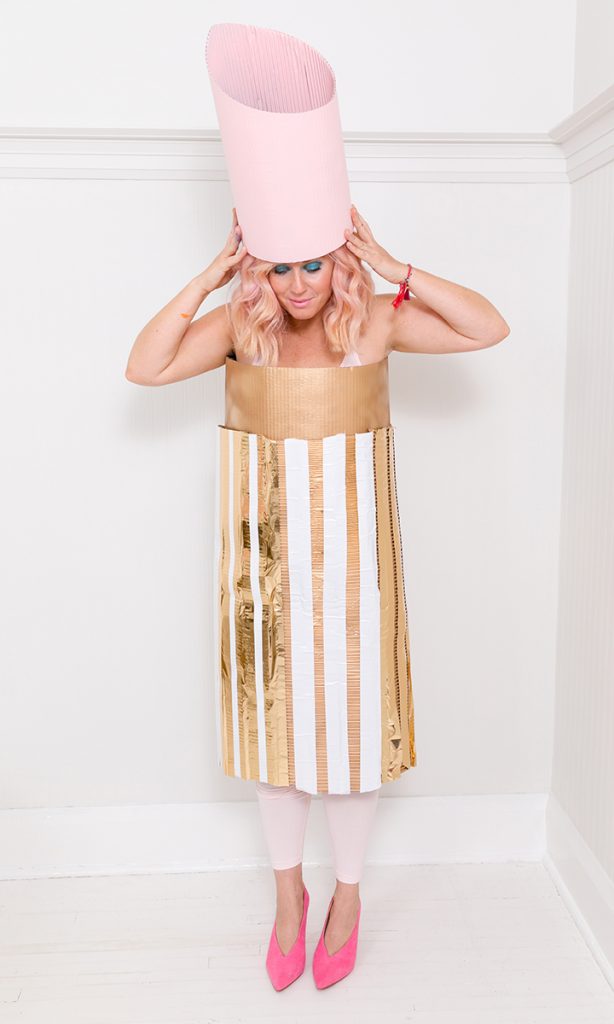
This lipstick costume is probably my favourite Halloween creation yet. Of all the wild things I’ve made and worn for the holiday, this is one of the easiest and most stylish. Plus, it’s essentially just crafted from cardboard, and in almost no time! If you’re looking for a last-minute costume that will make your pals giggle in delight without breaking the bank, this one is it!
Want more Tiffany? Check out these gorgeous goop-free pumpkins 4 ways, plus 12 easy DIY projects that will brighten your home.

