
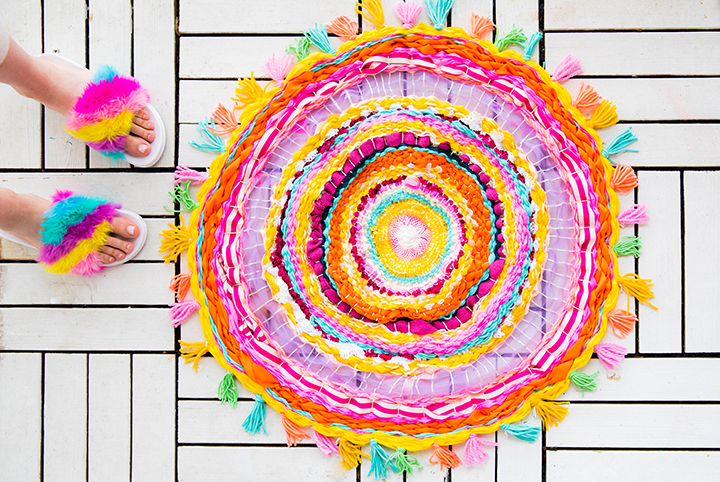
Outdoor patio dazzling always delights me because every year I get to do something in my outdoor space a little different. When I laid down my patio floor a few years ago I realized that it needed to feel more cozy and warm when I pad out outside in my bare feet or sandals! Outdoor rugs are usually nice but they don’t always come in fun shapes or great textures. Here, I have broken out my old high school weaving skills, made my own loom out of cardboard and made myself a stunning and perfectly sized round outdoor rug!
This is what you will need for your DIY outdoor rug:
- Any fabric or material that can be cut into strips. Some examples are:
- Old dish rags
- Old cotton t-shirts cut into strips
- Leftover ribbon
- Strands of sequins
- Plain white string
- Scissors
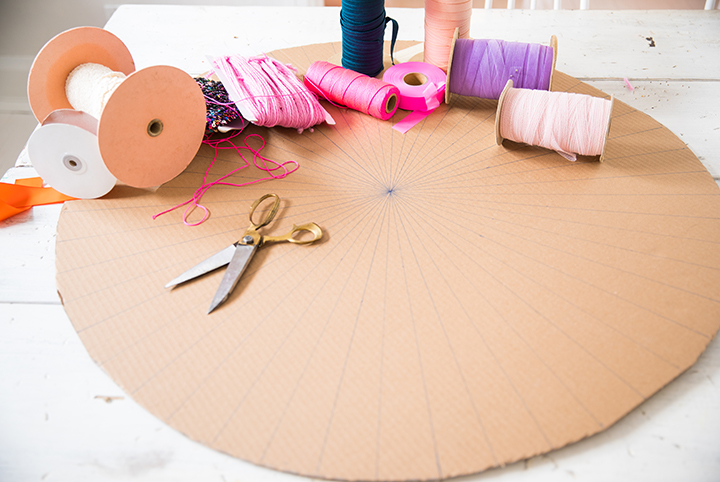
- A large piece of cardboard
- Optional: Pencil and ruler
Step One: Determine Your Rug’s Shape
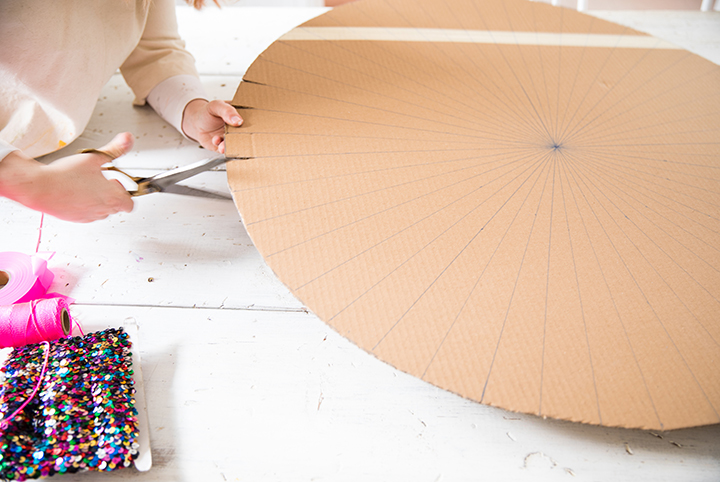
Cut a large piece of cardboard into the size and shape of the rug that you would like to weave. I personally think that round is really fun to make-but you can also make your own loom in any other shape. I grabbed a ruler and a pencil and drew lines where I wanted the lines of the loom to be.
Once you have drawn the lines around the cardboard, start to cut 2″ slits all the way around.
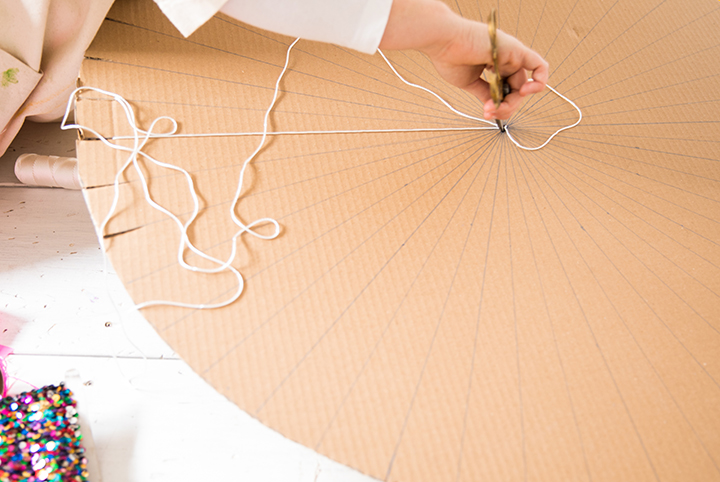
Step Two: Make Your Loom
Using your scissors you can cut off a very long piece of white string and begin winding the string through the slits and through the centre.
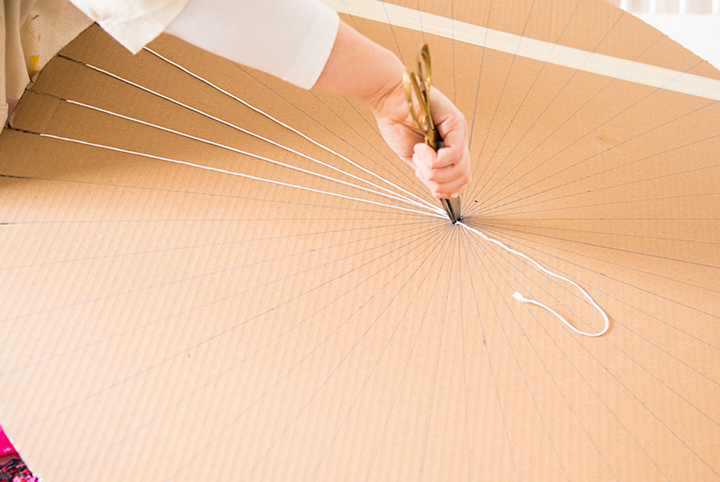
Repeat this over and over until the whole loom is set up.
Step Three: Weave The Pattern
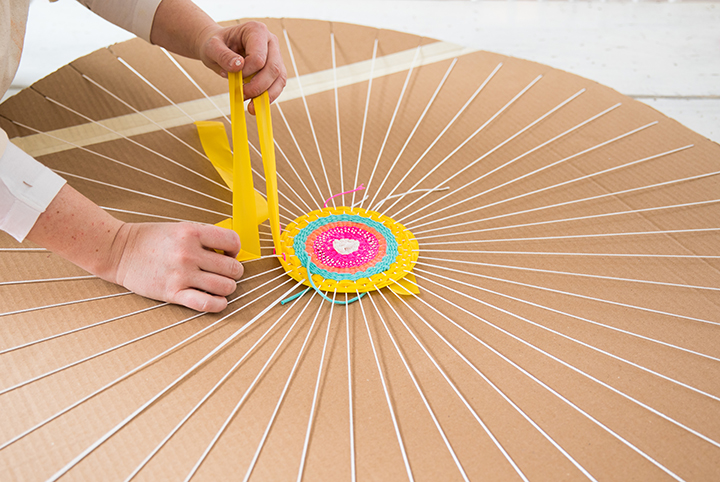
Starting in the centre of the loom, you can start the centre spiral by tying your first piece or fabric or string to the middle and pushing it tightly into the centre of the loom.
Once it is attached wrap this fabric, ribbon or string over and under each string-around and around. Literally! That is all you do!
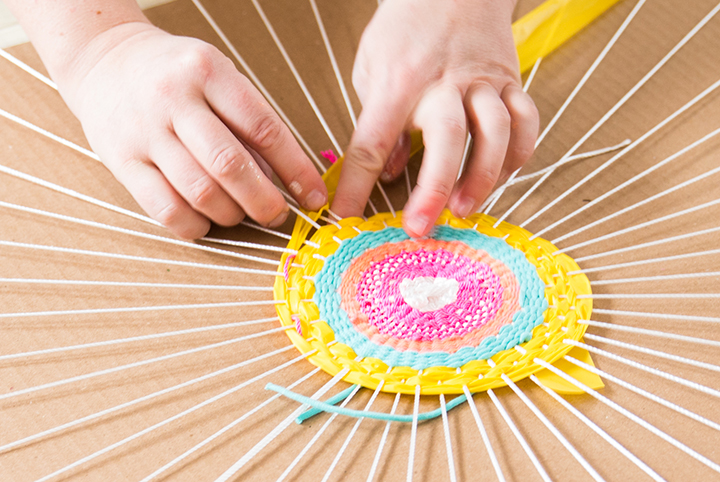
Once the strip of fabric, string or ribbon is done you can tie another piece to it and just keep weaving over and under, over and under, over and under until the whole thing is done!
Optional: Add Extra Flair
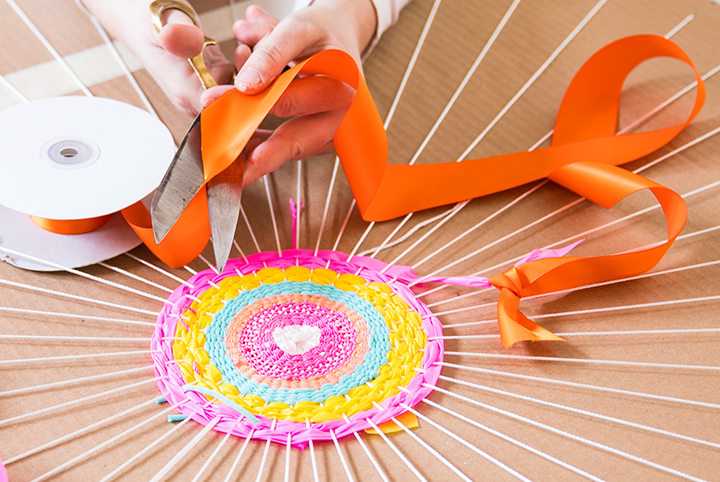
Once you have finished your little outdoor rug you can make little tassels to finish off the edge. This is totally optional! The rug will look so cute on its own-but adding a little tassel fringe like I did takes it to another place. All you have to do is cut 2.5″ lengths of string or ribbon and weave it under sections of the upcycled rug all the way around. Once you have the yarn weaved under, grab another length of yarn and wrap it around and around the bundle of yarn folded over. Too easy!
For more of Tiffany Pratt’s colourful DIY creations, visit the HGTV.ca DIY section!

