
We must confess we absolutely adore the holiday season. A home filled with cheery string lights, a Christmas tree and all sorts of festive decor on our living room fireplace mantel is all we need to get in the right mindset this month. We recently visited the dollar store and found that with only $30, you can make affordable (and super stylish) holiday DIYs to decorate your space. Plus, you can reuse them next year!
Originally published on Dec 7, 2021. Updated December 20, 2022.
Related: Dollar Store Holiday Decor: 5 Festive and Easy DIY Ideas to Try

Holiday Dollar Store DIY #1: Pretty String Trees
Materials Required:
- Cone mould (polystyrene or cardboard base)
- Plastic wrap
- String or embroidery floss
- White glue & a cup
- Scissors
- Hot glue gun & glue sticks
- Wooden star
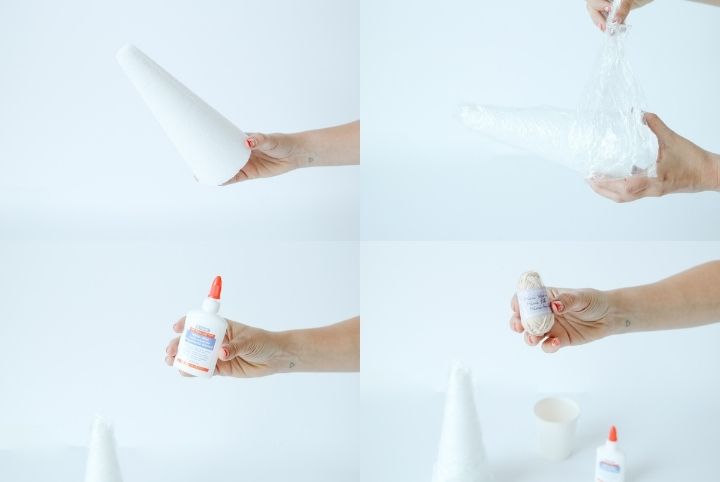
Step One: Prepare the Base & Glue
Start by wrapping the cone mould with plastic wrap, covering it entirely. Grab your cup and poke two small holes in it to pass the embroidery floss through. Fill the cup with white glue, ensuring the floss gets soaked in it.
Related: Cute and Colourful DIY Christmas Card Ideas by Tiffany Pratt
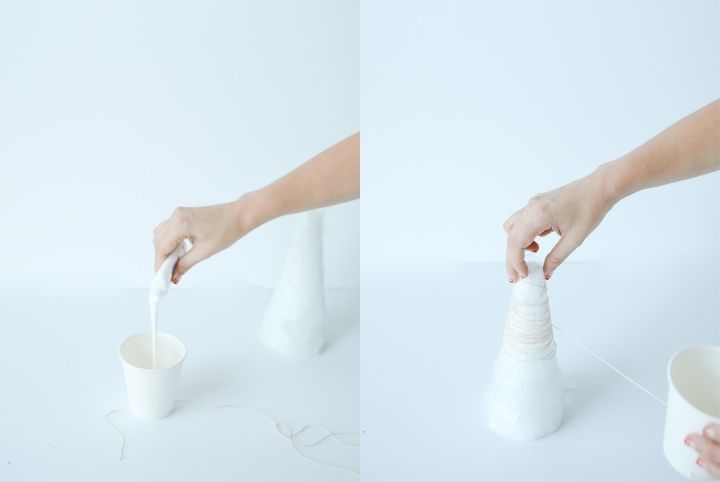
Step Two: Wrap the String Around the Cone
Grab your string and start wrapping it around the cone mould, pressing firmly. Start from the top (securing the end) and wrap it downwards around the mold until you are happy with the amount of string and how it looks. Leave it to air-dry for a few hours.

Step Three: Remove the Tree From the Cone & Add Star
Once the tree is completely dry, remove it from the cone mould. Using your hot glue gun, attach the wooden star to its top to finish it off.
Related: How to Make These Stunning Pastel Drip-Painted Ornaments

TA-DA! Isn’t she pretty?

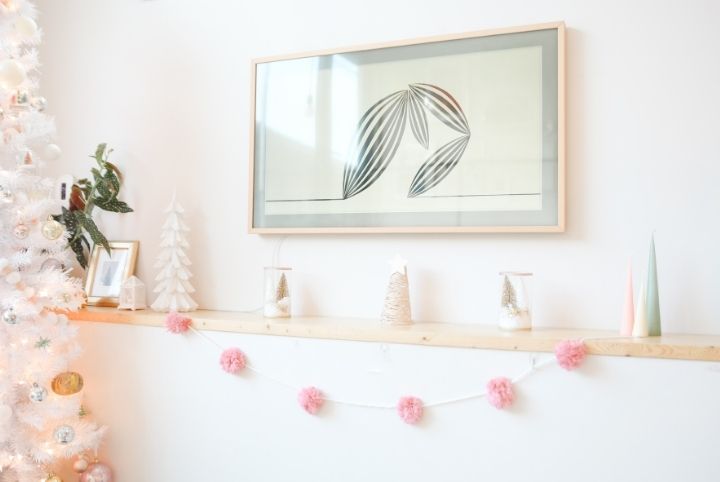
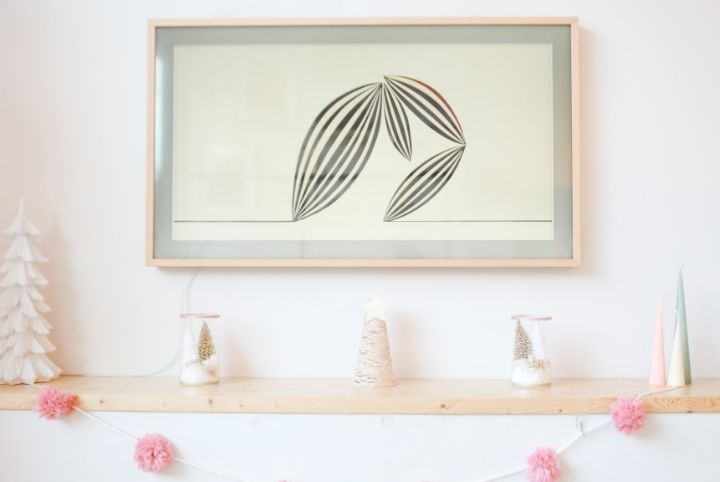
Holiday Dollar Store DIY #2: Pom Pom Garland (in Less Than 15 Minutes!)
Materials Required:
- Thick yarn (different colours)
- Piece of cardboard
- Scissors
- Hair brush
Related: How to Make Enchanting DIY Snow Globes
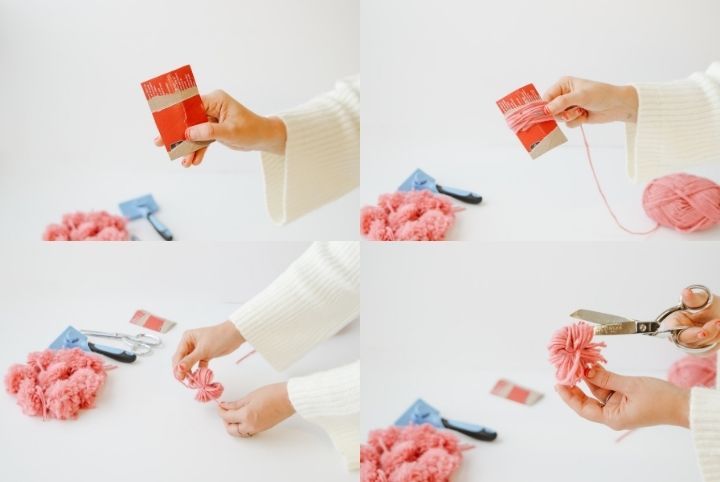
Step One: Make the Pom Poms
Grab any piece of cardboard as your pom pom base and begin wrapping the yarn around it numerous times (I counted 40 times). After you finish wrapping it, cut the end of the yarn and remove it from the base. Cut a long piece of yarn and double knot it in the middle of your yarn ball.
Using your scissors, cut the loops of yarn on either side of your ball and fluff them up. Use your scissors to trim the ball into a lovely round pom pom.
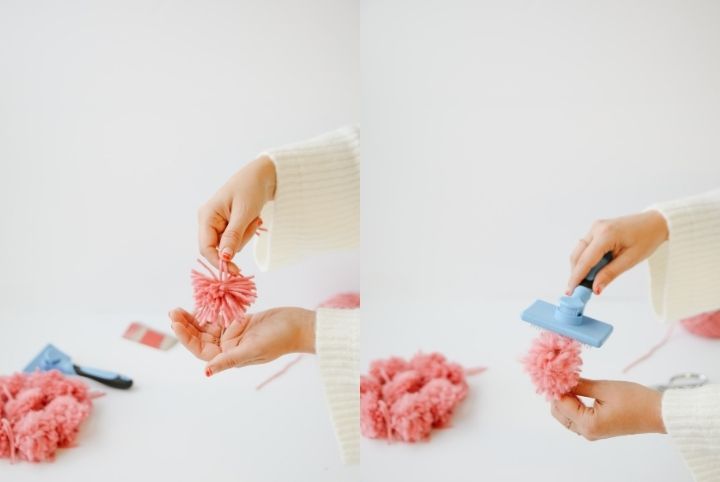
Step Two: Make the Pom Pom Fluffy
After trimming is complete, grab a hair brush and brush your little pom pom gently to create a fluffier ball. You’ll need to make about eight pom poms to jump to the next step (the garland!).
Related: DIY Wrapping Paper Ideas Made With Household Items

Step Three: Turn it Into Garland
This is the easiest step of our DIY. Simply cut a long piece of yarn (about 40 inches) and tie each pom pom to the yarn. Once the pom poms are strung into garland, slice them to set them evenly and shake them.
Can you believe you made this stylish garland in so little time?
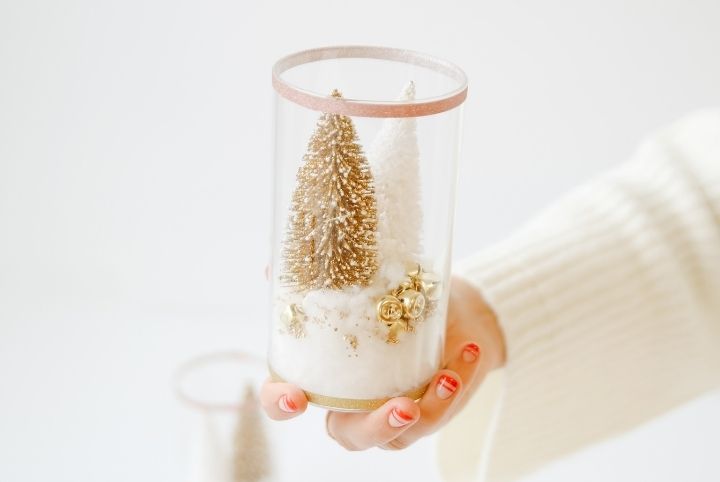
Holiday Dollar Store DIY #3: Magical Vases Filled With Ornaments (and Snow!)
Materials Required:
- Glass vases
- Mini trees
- Artificial snow
- Gold & rose gold washi tape
- Gold foil flakes
- Mini ornaments
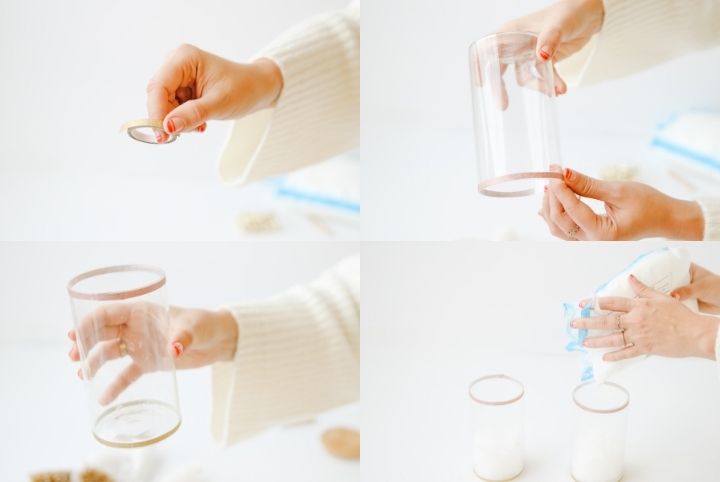
Step One: Start With Washi Tape
Clean your glass vases and add two pieces of bright washi tape to the tops and bottoms of each vase. We mixed colours, using both gold and rose gold tape.
Related: Add More Hygge to Your Home With These DIY Pressed Flower Candles
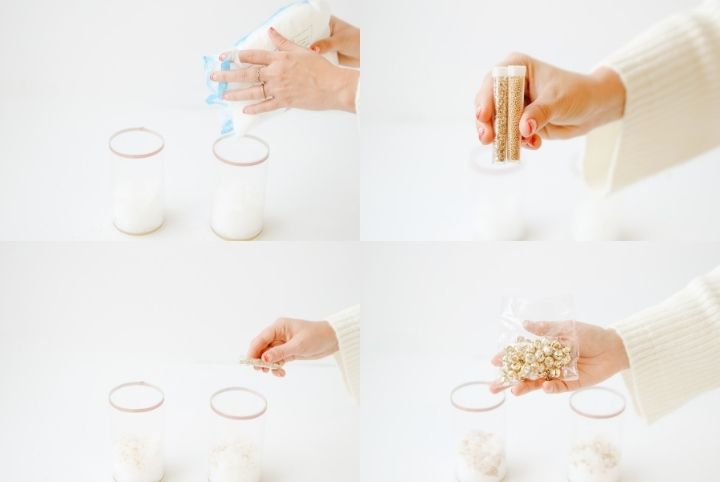
Step Two: Have Fun Filling the Vases
Start with the artificial snow and add about 1/4 cup, followed by the gold foil flakes and then the mini ornaments (bring on everything shiny!).
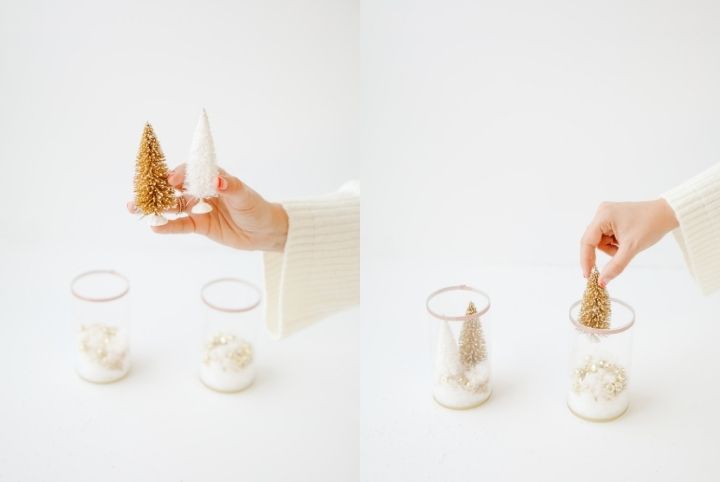
Step Three: Finish it Off With Mini Trees
Add two mini trees inside each vase to finish it off. Now you can display them on your favourite table or shelf.
Related: The Best Christmas Decorations to Buy Now Before They’re Gone
Images courtesy of Maca Atencio

