
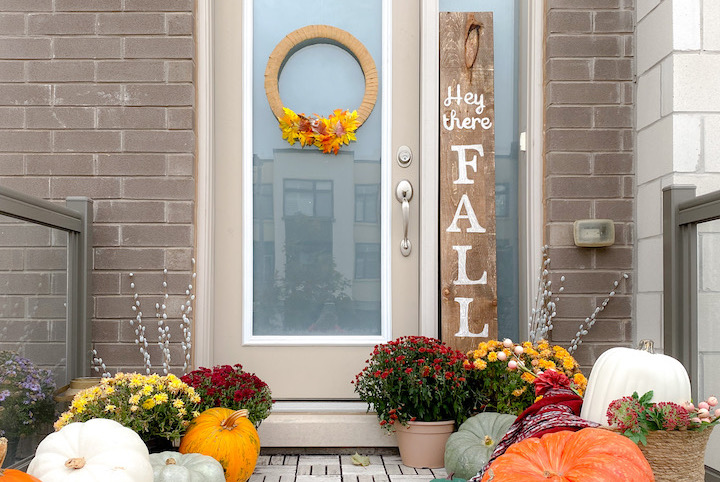
As soon as I see the first fall leaves turn red, I’m all about embracing fall decor like pumpkins, mums and a cozy autumn porch. A personalized DIY porch sign is easy to make for under $20 – and it only takes about two hours from start to finish. This tutorial is for a leaning sign, but you can use the same approach to create a hanging sign if you prefer.
Related: This DIY Thankful Tree is the New Thanksgiving Tradition We Need This Year
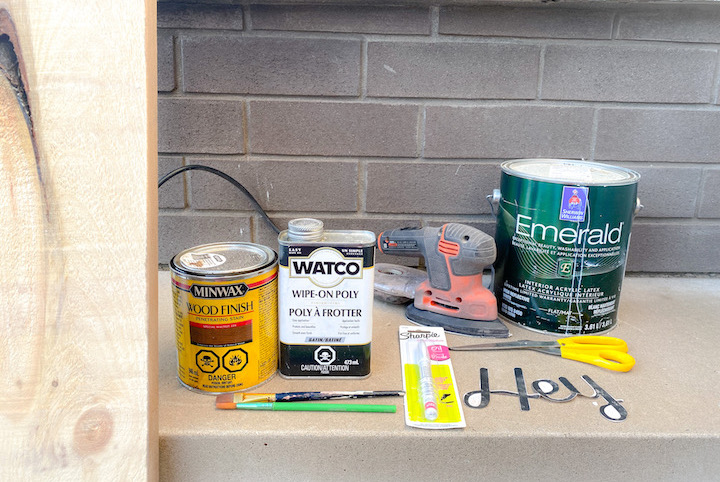
Materials Required:
- Barn wood, cedar or other pressure-treated wood (to hold up the weather)
- Paint
- Craft brush
- Sharpie paint pen
- P60 sandpaper or sander
- Wood stain and rag
- Polyurethane
- Pencil
- Scissors
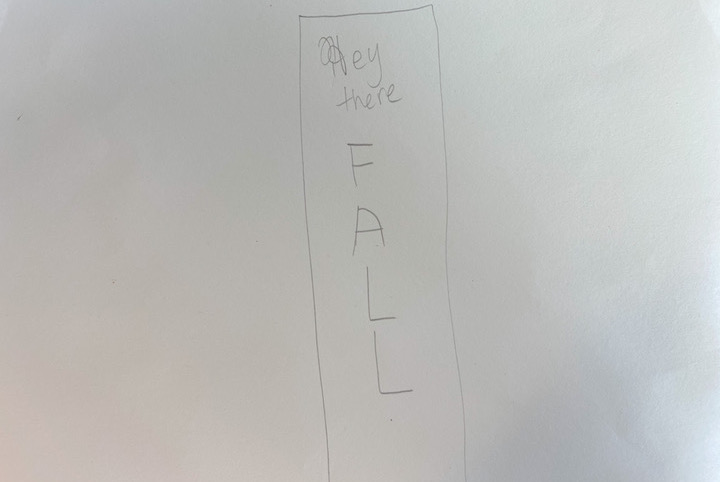
Step One: Design Your Sign
Start by planning out the design of your sign. The size of your sign depends on your porch size. Find a cute saying – here are some ideas:
- “Hey there, pumpkin”
- “Welcome to the patch!”
- “Fall harvest”
Related: How to Create Your Own Rainwater Catcher (and 13 Fun Other Outdoor Projects)
Step Two: Choose Your Words
On a computer, choose your font (you can find get free fonts online at Google Fonts) and use it to write out your sign’s saying. Blow it up to the size of your sign. Print this off.
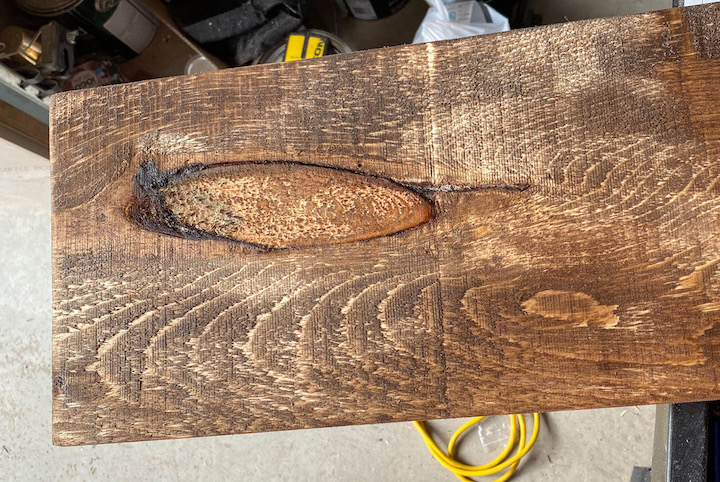
Step Three: Sand the Wood
Once you have your wood cut down to size, sand it with P60 sandpaper or your sander (to save yourself from splinters). I chose a barn wood for my sign, so I kept it looking rustic and just did a light sanding.
Related: These 4 DIY Pumpkins by Tiffany Pratt Will Keep Your Fall Decor Gorgeously Goop-Free
Step Four: Stain
Using an old rag, rub the wood stain into the wood. Apply the colour in layers until you get the desired look. Let this dry.
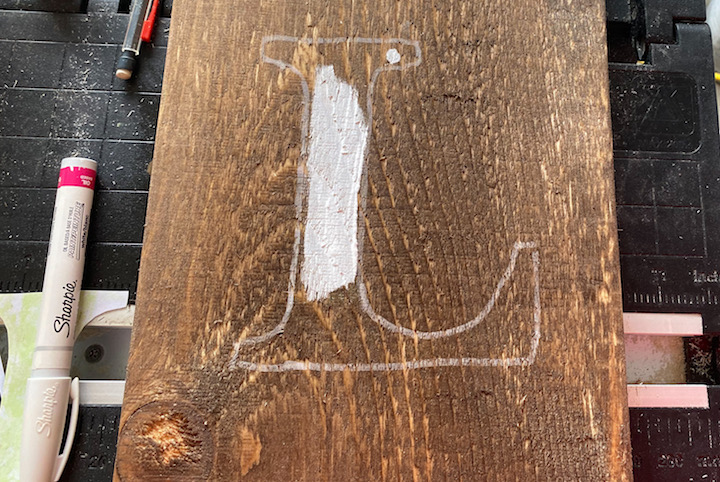
Step Five: Trace the Letters
Roughly cut the words out from your printed paper, and lay them on the board to figure out the arrangement. Trace the letters onto the wood using the Sharpie paint pen.

Related: Looking for Ways to Help Spark Creativity at Home? Design a Fun DIY Kids’ Craft Room
Step Six: Paint
Next, use a small craft brush and paint in the letters. You’ll need two coats of paint.
Step Seven: Seal It All
Seal the project by applying two coats of polyurethane. Be sure to wear gloves for this step.
Related: Celebrating at Home? This Colourful DIY Rainbow Pinata is Full of Fun
Set up your fall porch, and invite your friends over to view your new sign. Can you ever have enough pumpkins? Just asking for a friend!
Images courtesy of Hana Sethi

