
Start your new year on the right path and the right day, with a make-your-own perpetual calendar. Not only is it practical, it’s chic and sustainable too (sounds like three resolutions in one, right?). Watch the video to see how easily this beautiful calendar comes together, and scroll below for the seven simple steps to create a perpetual calendar.
Watch: How to Make Your Own Stylish and Sustainable Perpetual Calendar
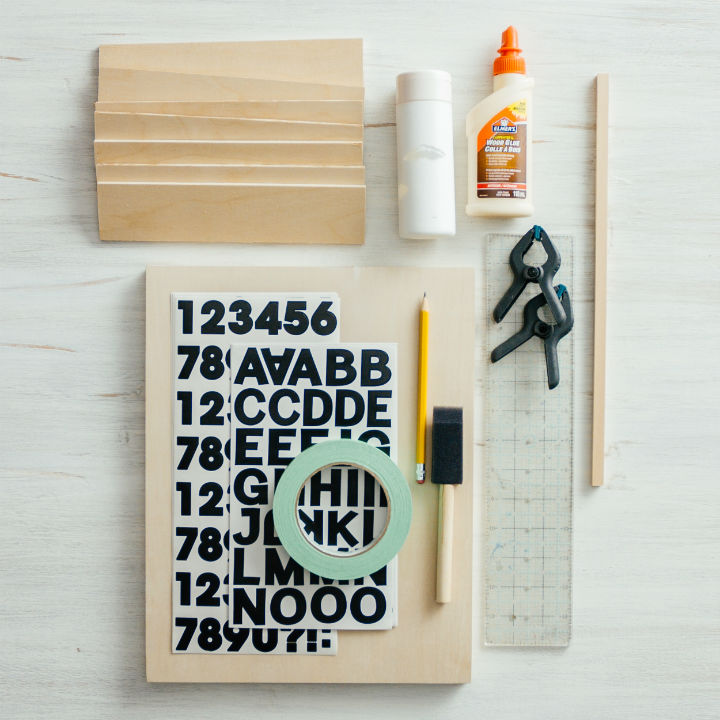
Materials for a DIY Perpetual Calendar
To make this DIY project you’ll need a plywood art board, a square dowel, glue, clamps, a pencil, a ruler, painter’s tape, white paint, a paint brush or sponge and stickers of number and letters.
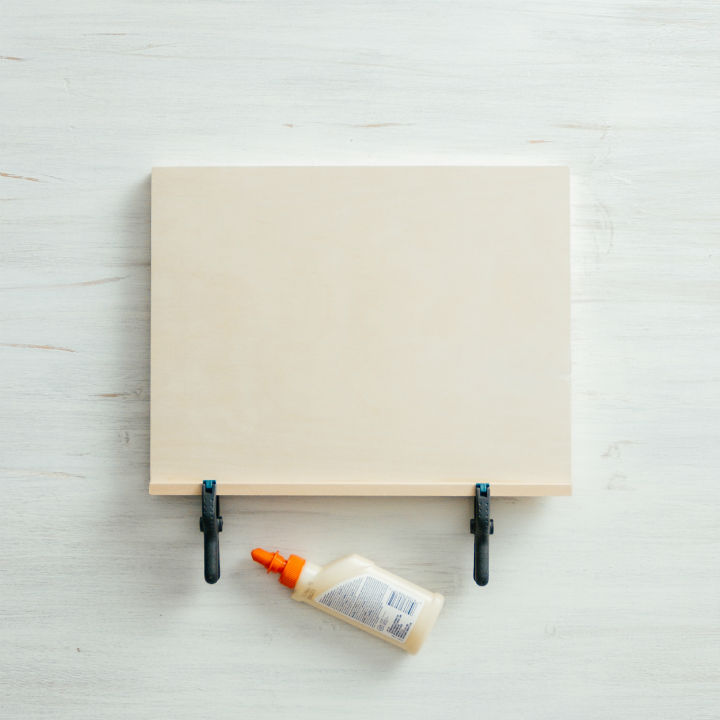
Step One: Create a Ledge for the Perpetual Calendar
Glue a square dowel onto a plywood art board along the entire length of the bottom of the board. Clamp the dowel in place while it dries.
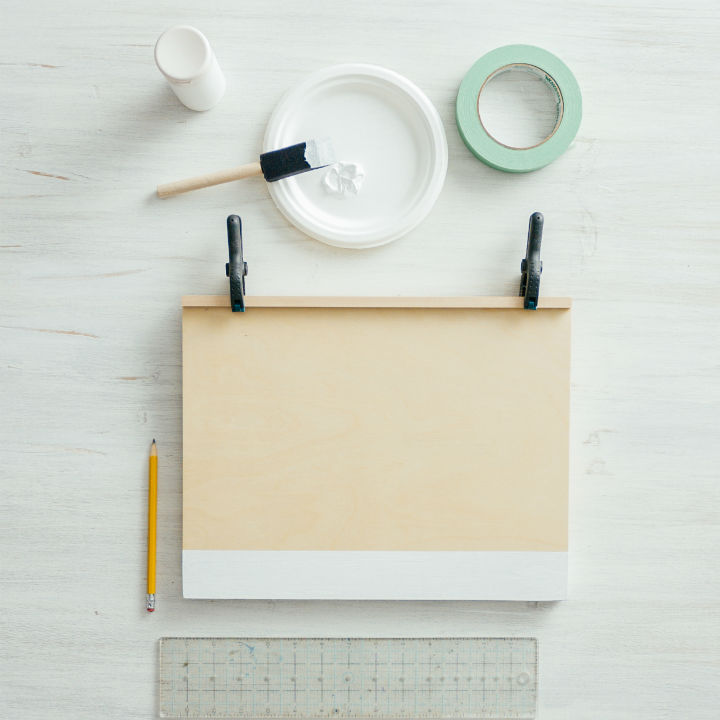
Step Two: Paint a Header on the Calendar
Paint a 1.25″ white strip along the top of the plywood board.
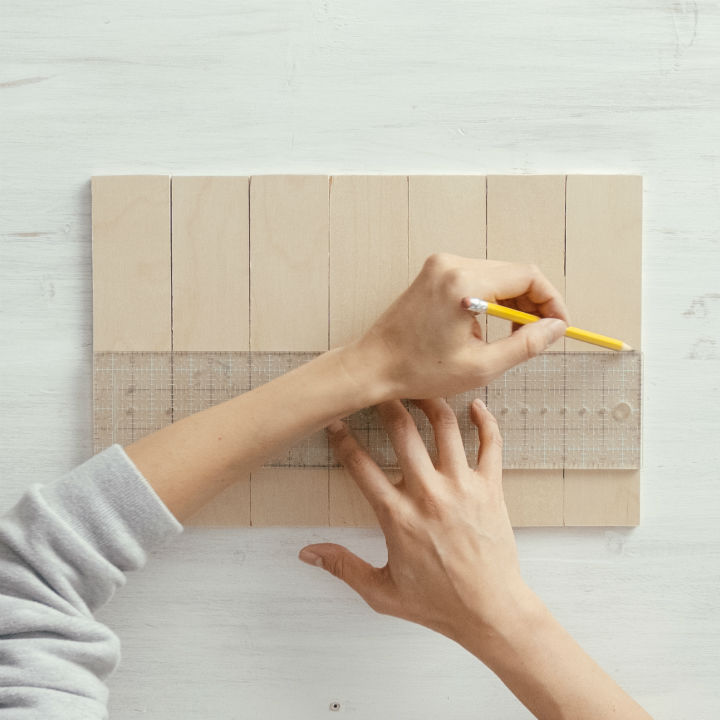
Step Three: Mark a Grid Across the Calendar
Line up all of the 2″ x 9″ pieces in a row. Mark every 1.5″ down each piece and draw a line across all of the pieces, to create a grid.
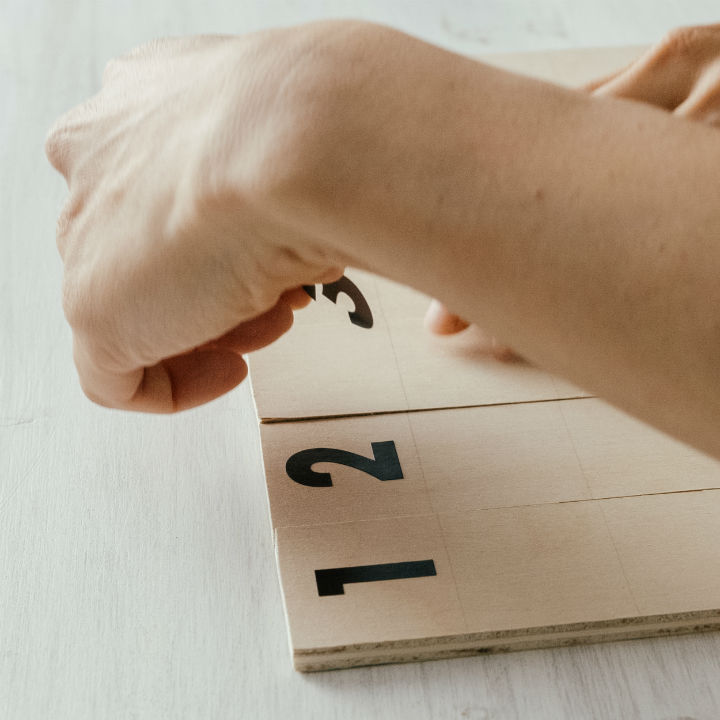
Step Four: Number the Days for Your Calendar
Using your line guides, attach number stickers from 1 to 31, starting in the first square, top left.
Watch: How to Make Your Own Stylish and Sustainable Perpetual Calendar.
Step Five: Number the Days on the Reverse Sides
Once step four is complete, turn the wood strips over and repeat this step with the stickers, starting with number two on the second line from the left.
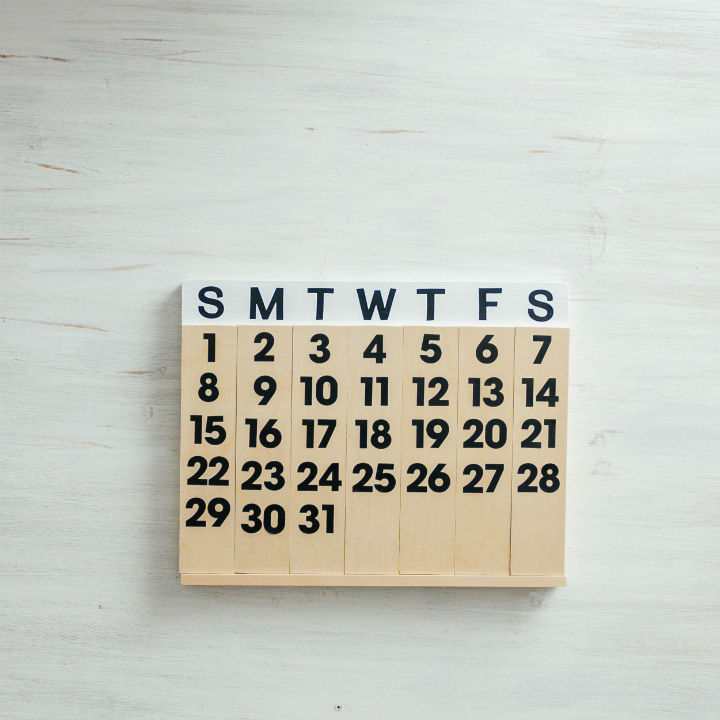
Step Six: Assemble the Days of Your Perpetual Calendar
Place the wood strips on the ledge of the plywood board.
Step Seven: Add the Days of the Week to the Header
Apply letter stickers in the white squares to mark the days of the week.
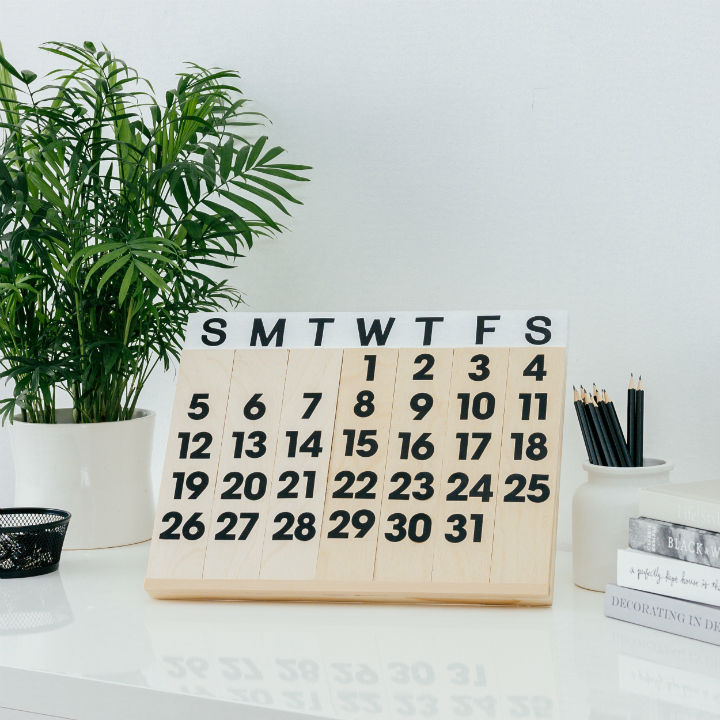
Once complete, arrange your perpetual calendar on a desk or by your entryway. This beautiful Scandi-inspired design looks best paired with a plant and a few black and white decorative objects.
Visit our HGTV Canada Pinterest page for even more creative inspiration.
For more DIY home upgrades, try a make-your-own living wall and nine easy projects by HGTV Canada stars.

