 DIY Sand Eggs for Easter Decorations and Tables")
When I was travelling in Switzerland, I discovered that you can buy Easter eggs at the grocery store that were already decorated. I could not believe my eyes! One of the greatest things about Easter is adorning eggs and I am always trying to invent new ways to decorate them. There are so many wonderful things you can do outside of the drug store kits, using stuff from your everyday craft store. Enter: Coloured Sand!
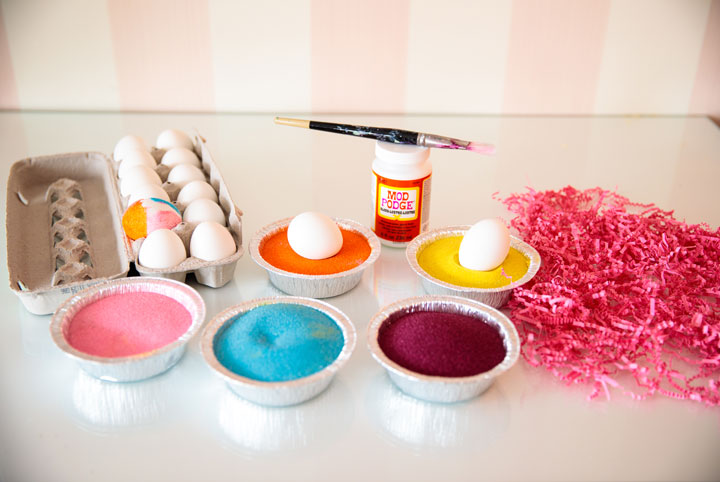
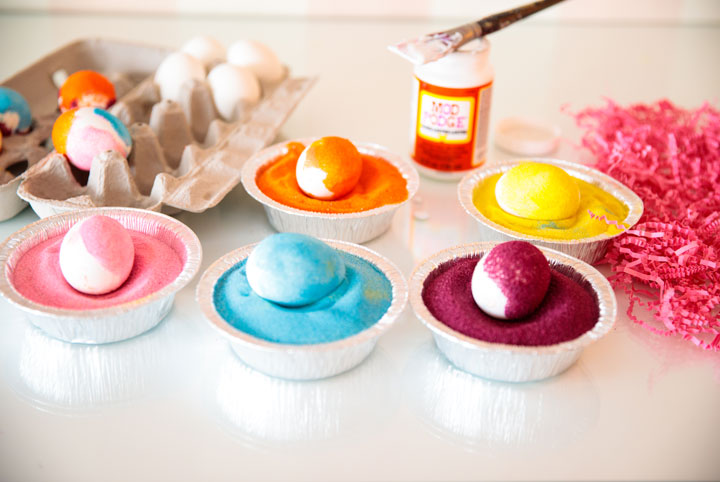
Here’s what you need to make colourful DIY sand eggs for Easter:
- Coloured sand of any kind (you can find it at most craft stores)
- White glue
- A paint brush
- White hard-boiled eggs
Step One: Preparing Your Eggs
Hard boil your eggs. I recommend using white eggs as the brown ones will make all the colours look muddy. Once your eggs are boiled and cooled it is time to start decorating.
Step Two: Preparing the Sand
Pour as many colours of sand as you would like into shallow bowls. I like to keep my warm colours together and my cool colours together. That way when the sand mixes it still makes a really pretty colour.
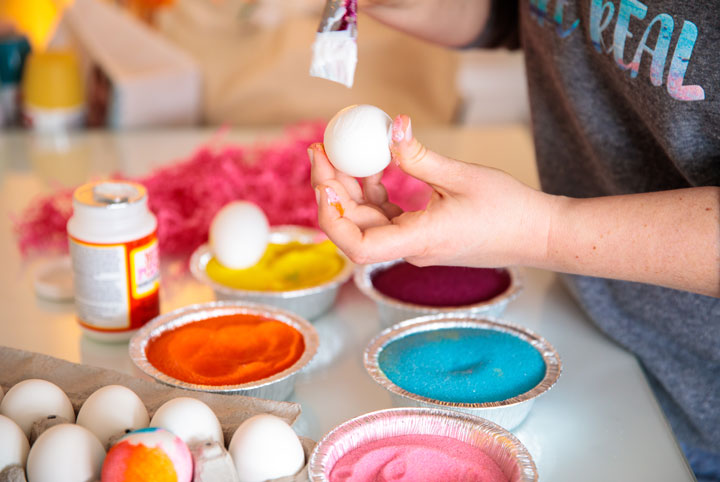
Step Three: Cover the Eggs in Glue
Start brushing white glue all over your egg. I like to just completely cover the eggs-you might find it easier to one half at a time. Also, I am no stranger to getting my hands into something sticky, so I always use my hands when I do this kind of project. Give it a whirl! It will make moving the egg through the sand so much easier.
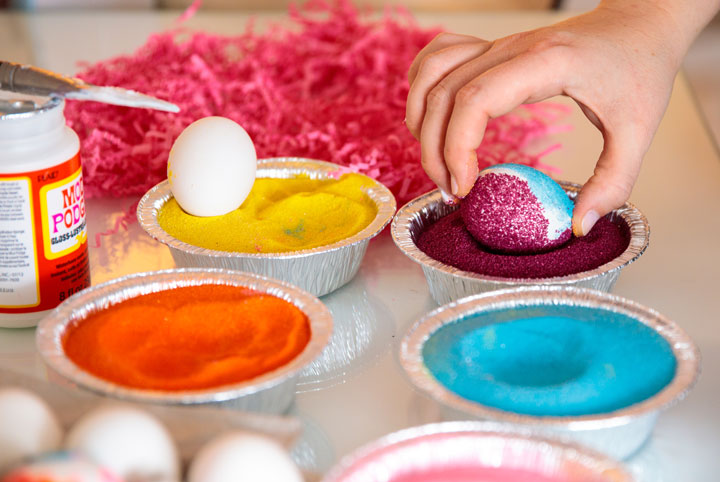
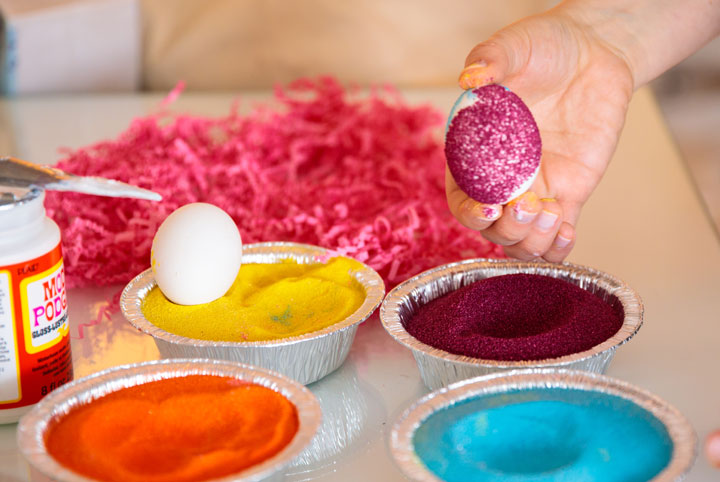
Step Four: Roll Your Eggs in the Sand
Begin rolling your eggs through the different colours of sand. You can do this as methodically or as fancy-free as you would like. Just remember to keep colours that blend well together so that when they overlap (and they will) the colours make a pretty second colour together.
Step Five: Allow Your Eggs to Dry
Let them dry and then display! Because these eggs are adorned with coloured sand you have to place them in a glass bowl and leave them alone. The more they get touched, the more sand comes off, so keep your eggs in a safe, touch-free environment!
Don’t they look so cool and colourful? They are so easy to make (they literally take a minute!) and I really like the idea of using a material on the eggs that is dry! It puts a whole new spin on decorating eggs and using something that can easily be found at any local craft or dollar store for little money and delivers great results!
For more gorgeous DIY projects by Tiffany Pratt, visit HGTV.ca’s DIY section!

