
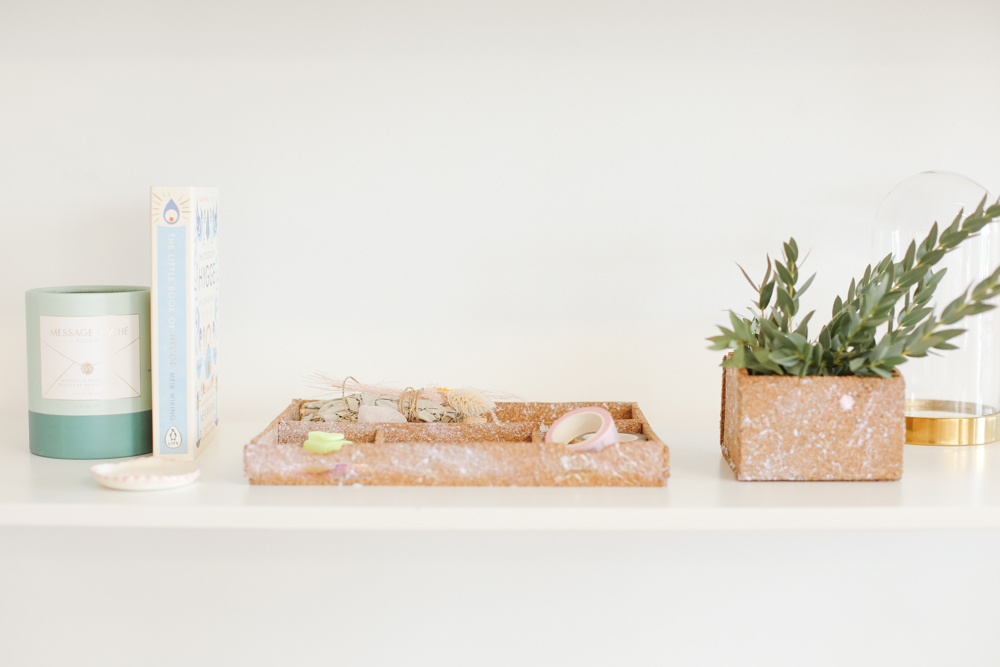
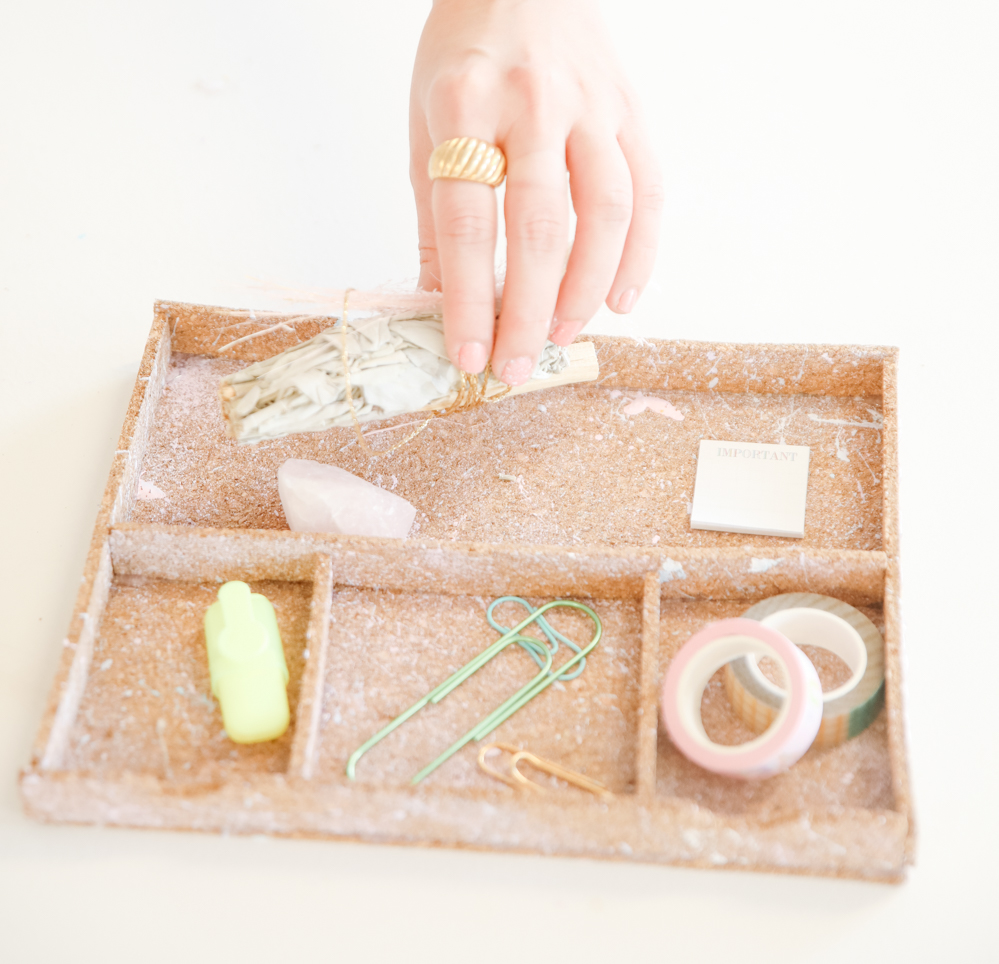
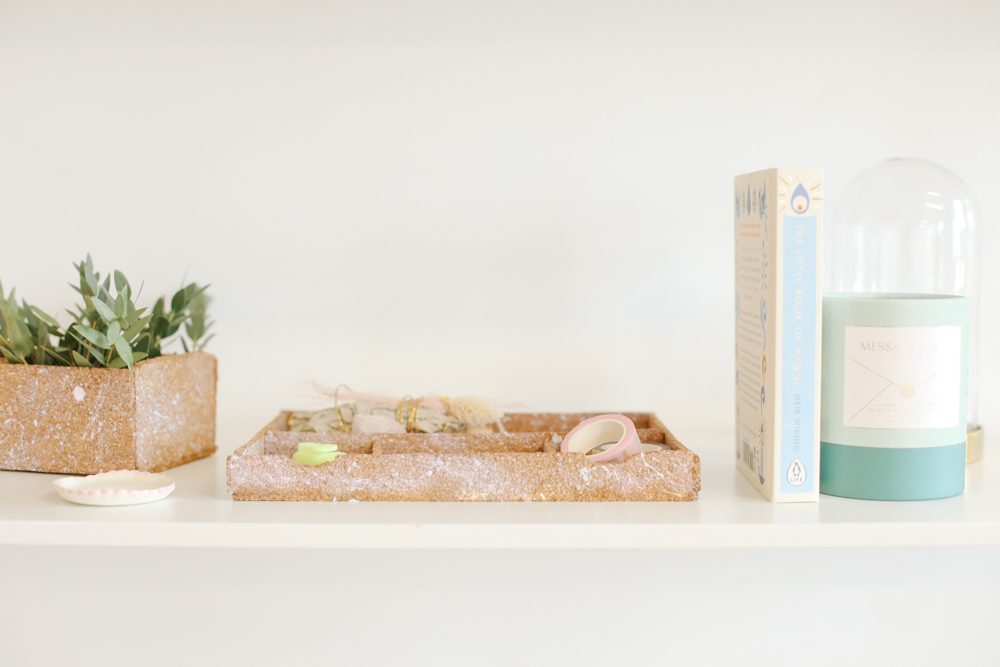
Today’s DIY is all about office organization! Now that we spend more time working from home, we want to help you keep your spaces neat and tidy with these beautiful cork board organizers. These can be used for holding paper clips, pens, markers and even a plant organized. Let’s jump into it, shall we?
Related: The Ultimate Spring Cleaning Checklist
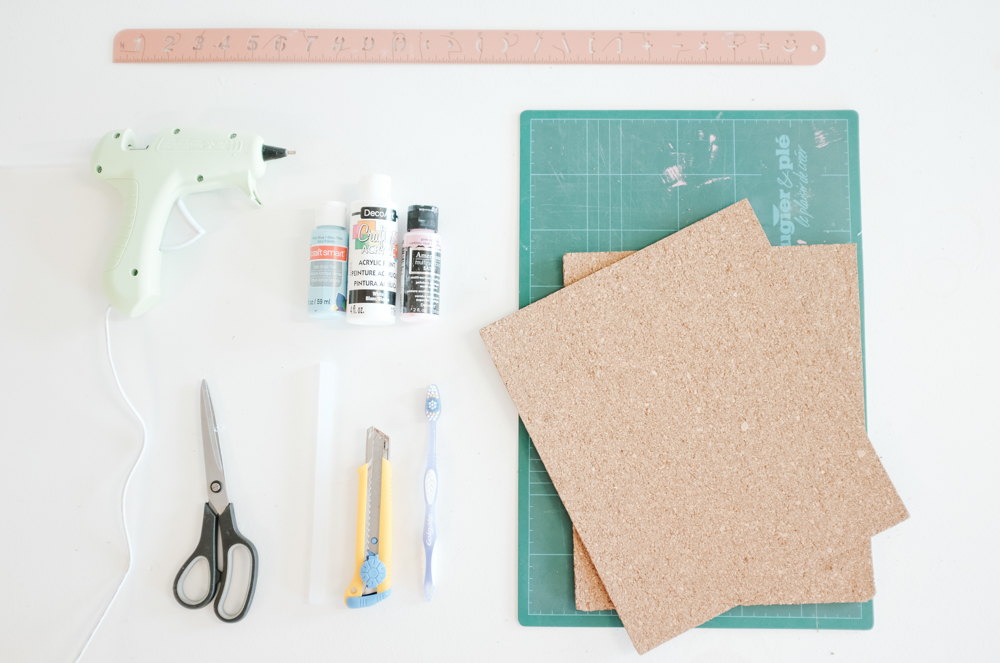
Materials Required:
- Cork sheets
- Hot glue gun and sticks
- Cutting mat
- Exacto knife or scissors
- Ruler
- Toothbrush
- Assorted acrylic paint
Related: How to Make the Prettiest Cork Board Organizer for Your Wall in a Few Easy Steps
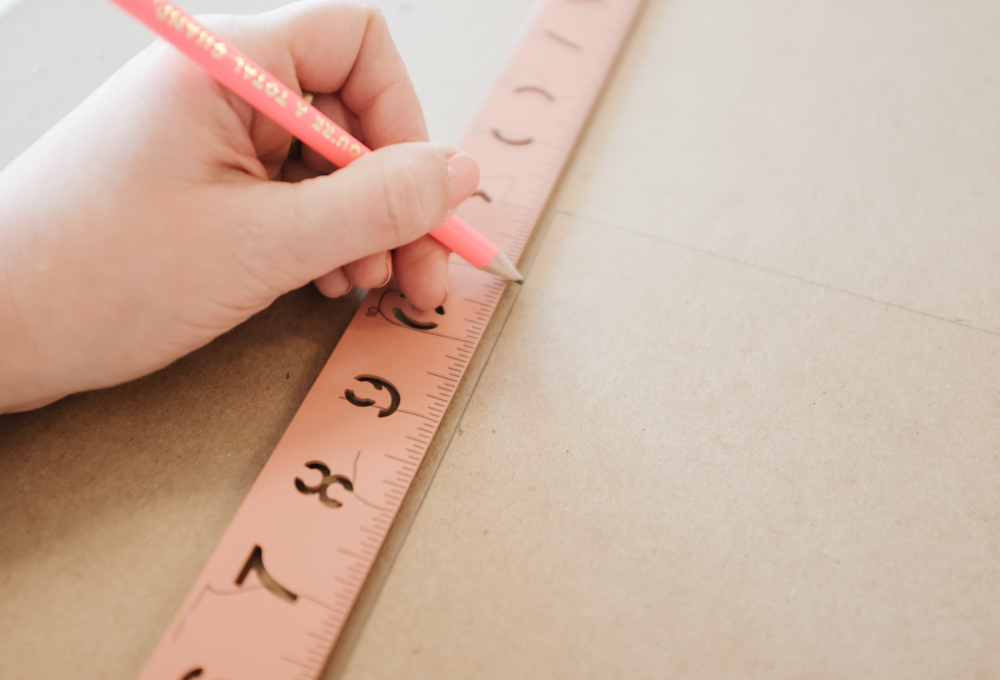
Step One: Plan Your Cork Organizer Design
Start by planning the design and creating cardboard templates before you start cutting the cork.
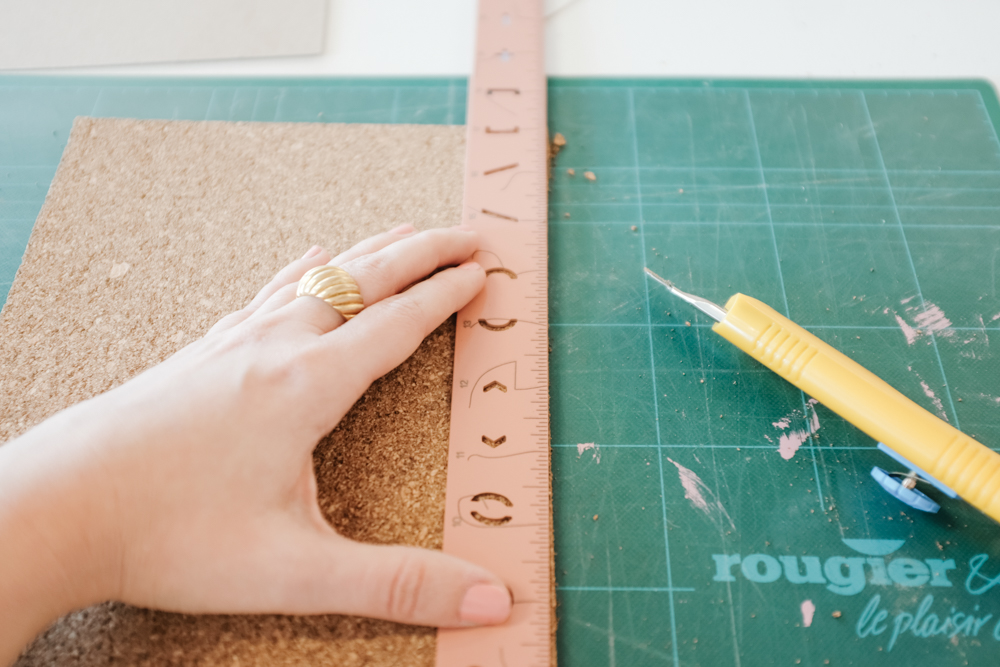
Step Two: Cut the Cork Using the Patterns
Using your scissors or an exacto knife, cut all your cardboard patterns and then place them on top of the cork sheets. Start cutting them carefully with the help of a ruler.
Related: This Adorable and Easy Kitchen Storage DIY Will Solve Your Organization Woes
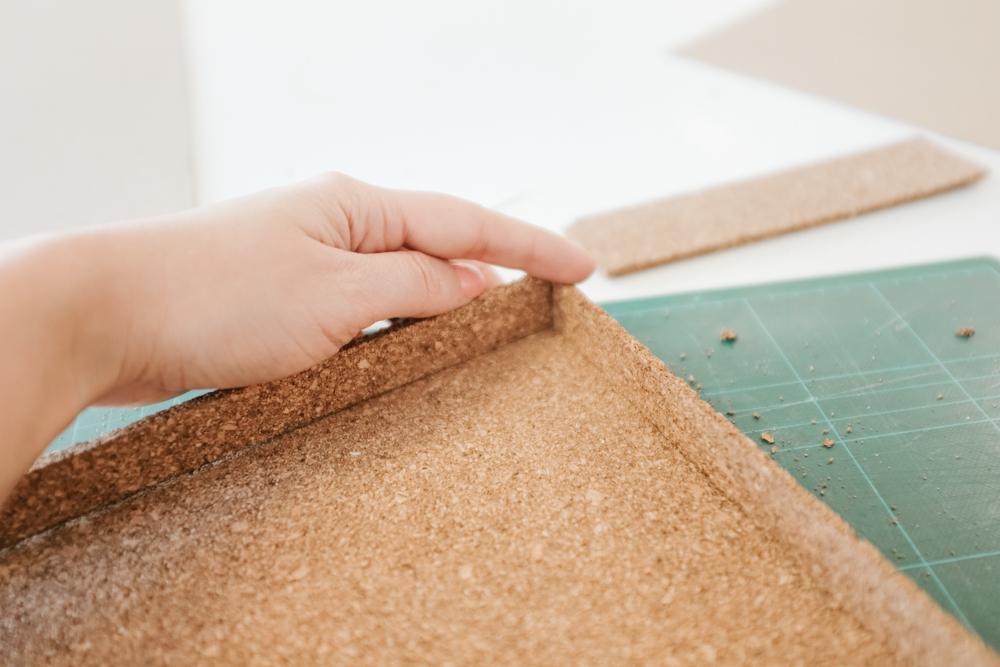
Make sure you start by cutting the bottom of your container, followed by each side of your organizer. Double check that all the walls are the same height.
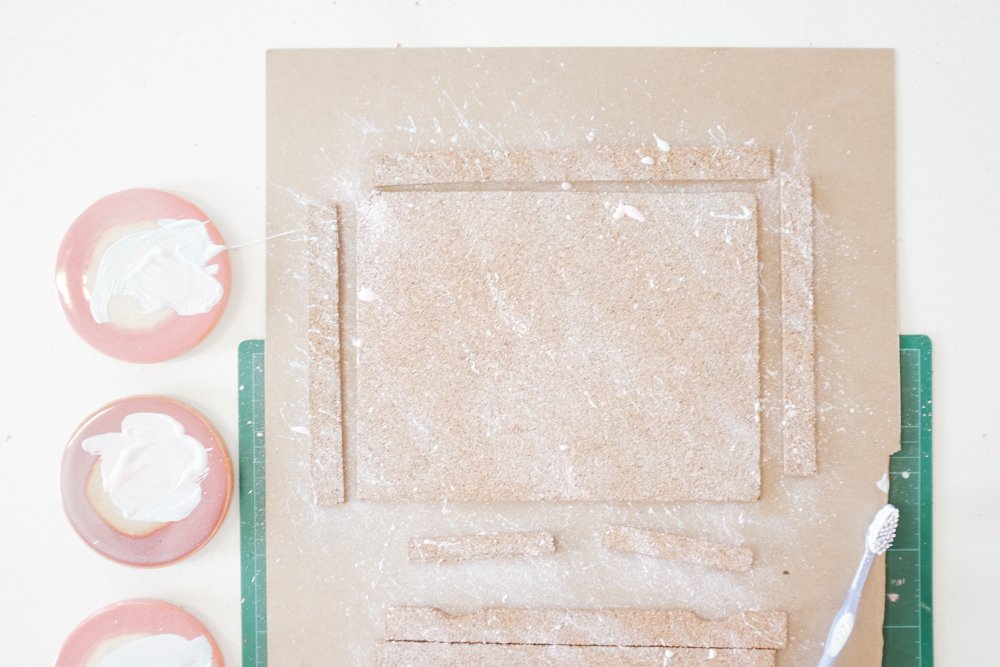
Step Three: Add Your Paint
Using your assorted acrylic paint, you will create a terrazzo effect with a toothbrush.
Related: The Best Storage and Organization Hacks for a Small Kitchen
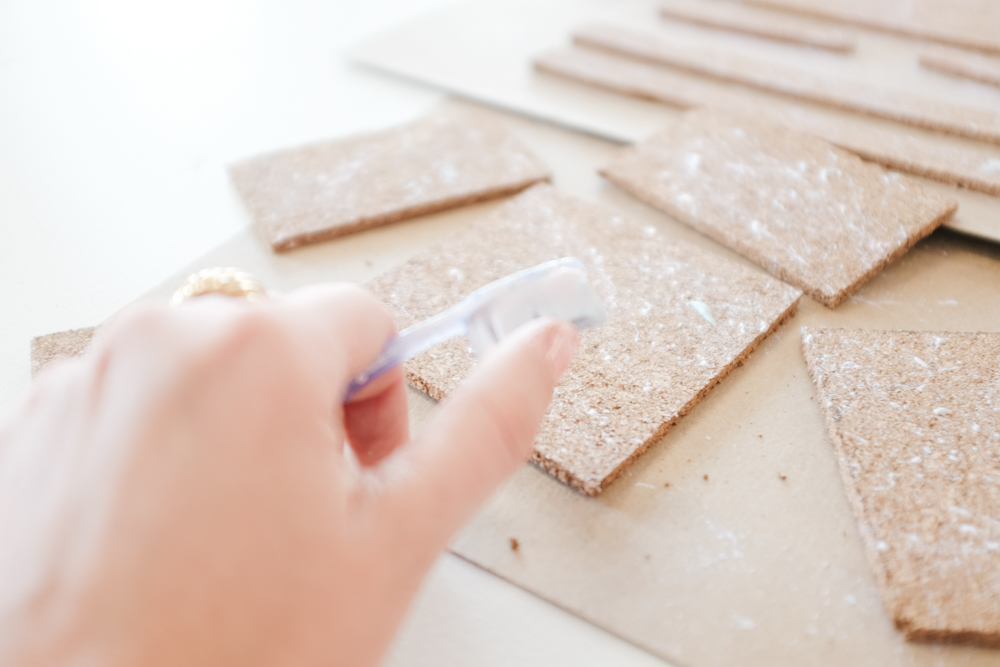
Fill your toothbrush with paint and using your finger, flick the paint directly on top of your cork pieces. Let the paint dry for approximately 15 minutes.
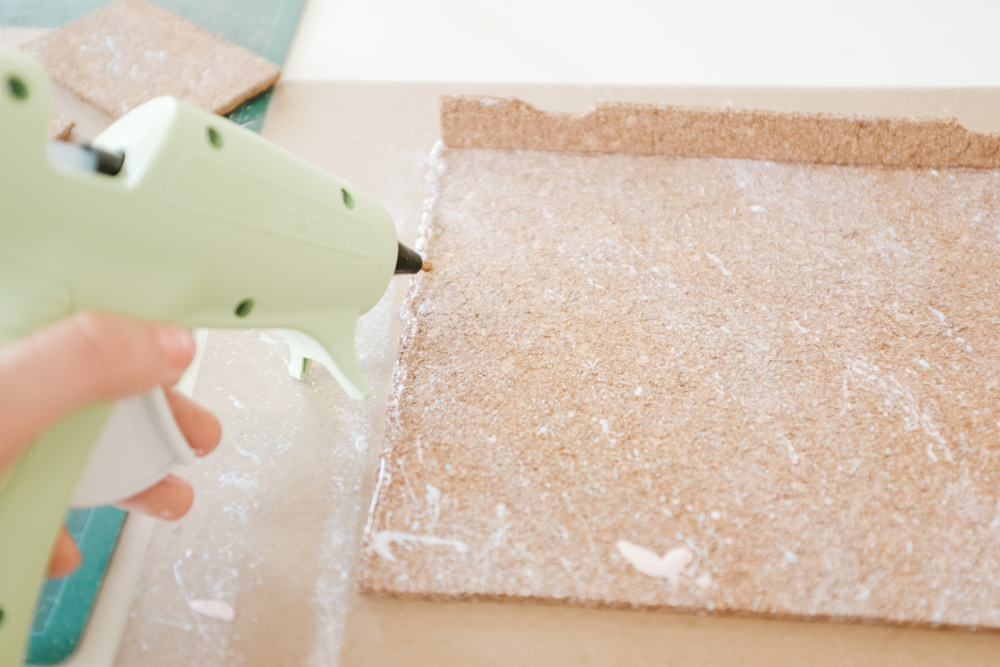
Step Four: Glue All the Pieces Together
Now that the cork sheets are dry, glue all the pieces together. Start by adding a hot glue line along all the edges of the base and then attach each of the walls, carefully and quickly.
Related: These Eco-Friendly Beeswax Food Wraps Are So Easy to Make
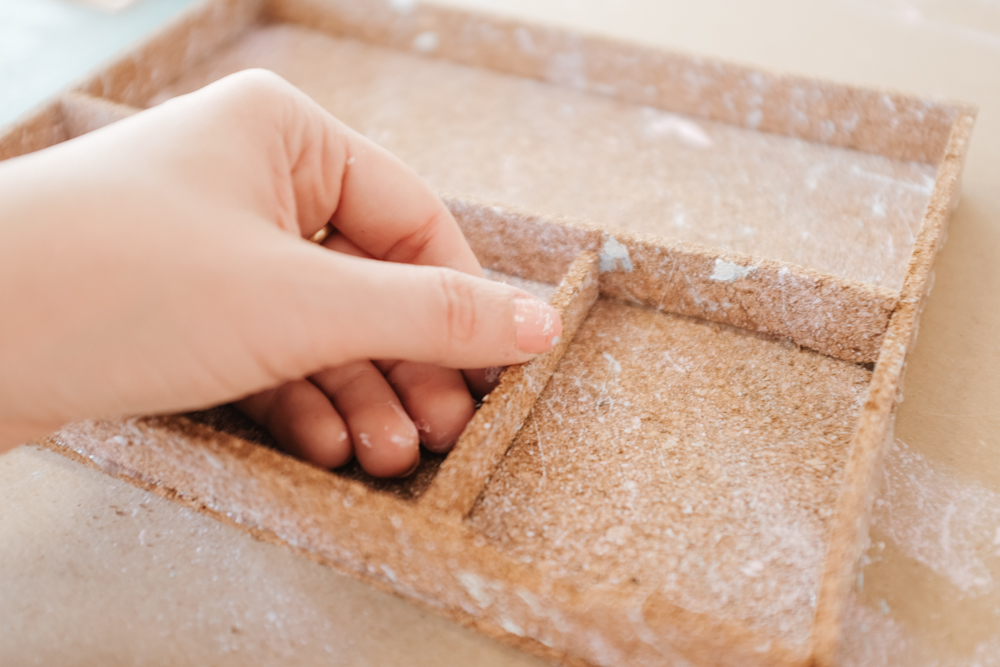
Tip: Start with the external walls and then move to the internal walls of your organizer. The cork sheets dry very fast, so you don’t need to wait a long time in-between walls.
Related: How to Make Homemade Reusable Disinfectant Cleaning Wipes
If you want to create a hanging wall organizer, it’s pretty easy to do! Just cut out a small hole in the back, and attach it to the wall. They are perfect for hanging plants.
Related: 15 Items Every Home Office Needs to Boost Productivity This Year

Cork is the perfect natural and sustainable material that you can have fun using at home. You can create different designs and shapes following the same steps outlined above. Happy DIYing!
Images courtesy of Maca Atencio

