
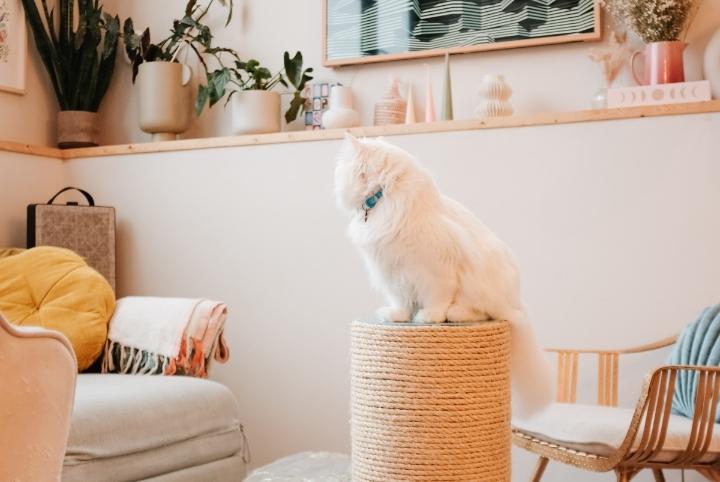
Cats love to scratch pretty much everything. If you’re a proud cat owner, you know how important it is to keep your furry friend away from scratching sofas, chairs and even carpets. The best way to do this? Provide them with stations where they can scratch to their little hearts’ content.
In today’s DIY, we’re showing you how to create a super chic scratch post in just a few easy steps. This genius solution kills two birds with one stone: it can be customized to match your stylish decor and it’ll keep your kitty active and happy.

Materials and Tools Required:
- 1/2 inch twisted sisal rope
- Building tube form (12 inches wide)
- Hot glue gun and heavy-duty hot glue sticks
- Exacto knife
- Small MDF piece
- Pencil
- Nails
- Hammer
- Drill
- Jigsaw
- 120 grit sandpaper
- Spray paint
- Measuring tape
- Masking tape
Related: 12 Stylish Pet Accessories Your Home Needs This Year (Ditch the Cat Tree)
Step One: Set Up the Base
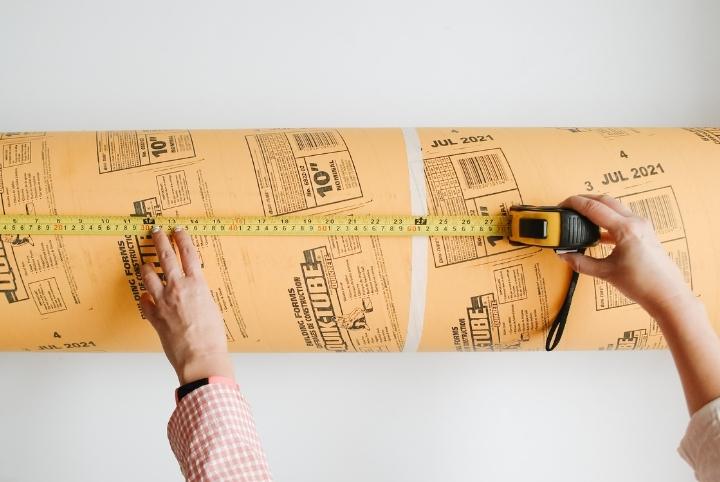
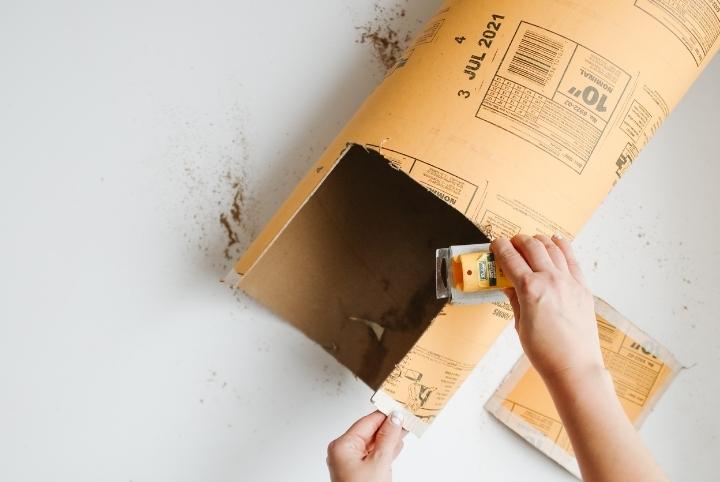
First, use a 12-inch-wide tube building tube form as the main structural base for your scratch post. This material is both sturdy and lightweight. We’re going to cut this tube into 24 inches in length. At the 24-inch mark, use masking tape to mark the circumference.
Step Two: Cut the Scratch Post Base to Size
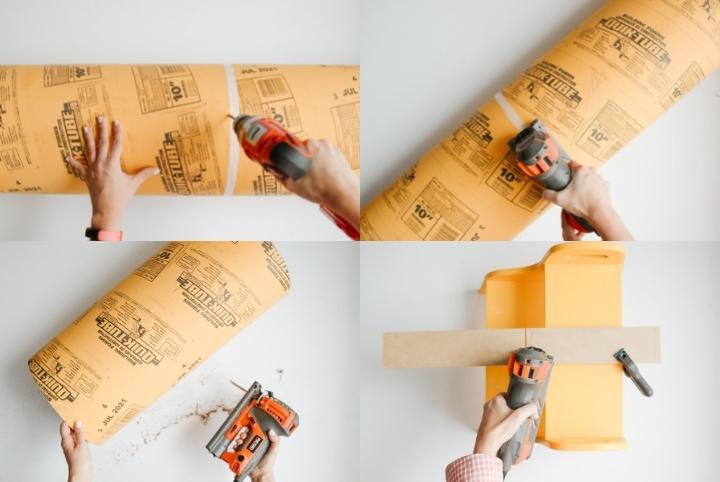
To cut the tube, drill a hole in one point of where you’ve marked the circumference. Using a jigsaw, cut the entire circumference evenly. Sand and remove the imperfections with a 120 sandpaper or sanding block.
Step Three: Attach a Small MDF Piece on Top
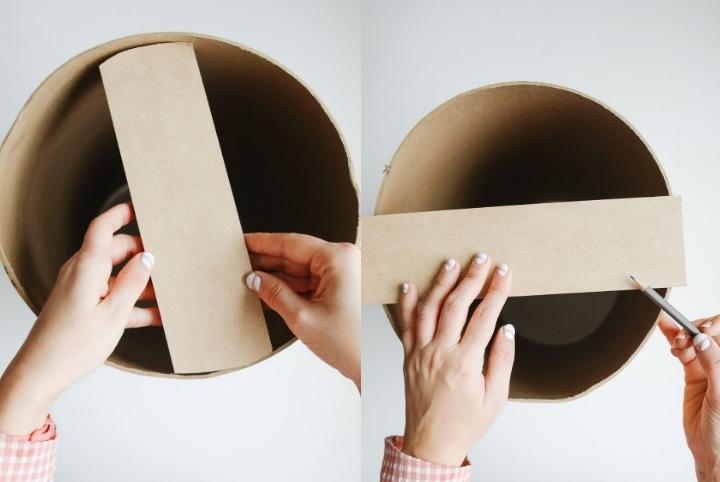
Grab a small MDF piece – this will serve as the support for our post top cover. With your pencil, draw the desired width of the MDF piece and cut it to size with the jigsaw. It doesn’t need to be perfect, but try to curve out the two short sides of the MDF piece so it fits snugly inside your tube. With a hammer and a few nails on each end, secure this MDF inside the tube.
Related: See the Surprisingly Beautiful Ways These Cat Owners Transformed Their Homes for Their Pets
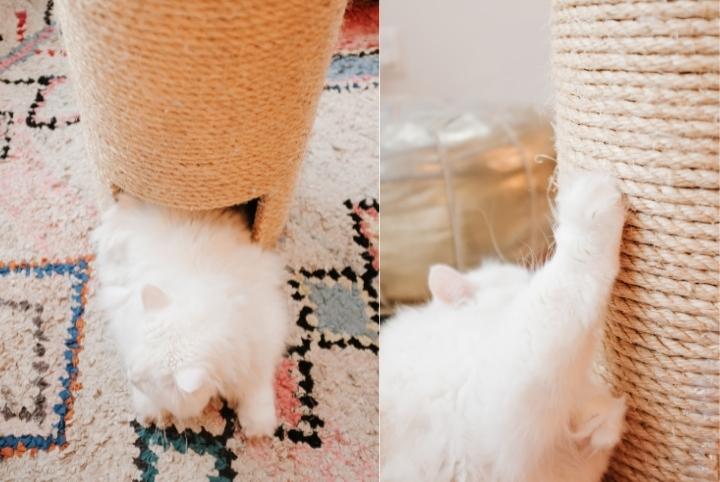
Step Four: Create the Front Door
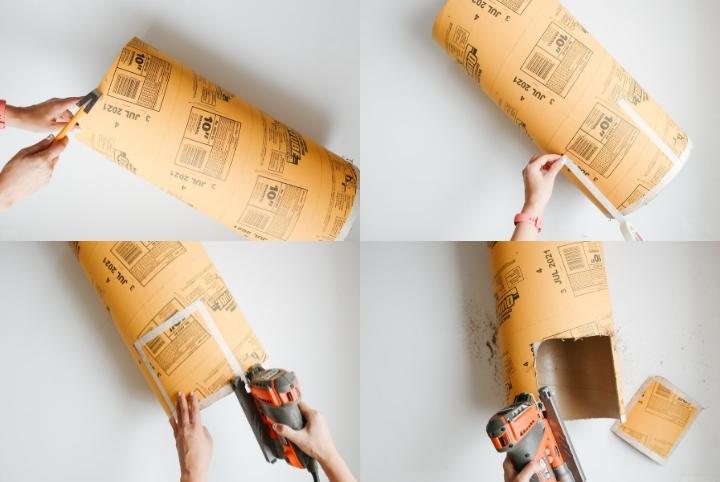
Grab your measuring tape and masking tape to sketch out a front doorway to your desired size. For a small kitty, an 8 x 8 inch is a perfect door size. Cut this doorway out from the tube using a jigsaw.
Step Five: Sand Your Brand New Door
Now that the base is ready, use a sandpaper or sanding block to remove any sharp edges around the door. This is very important for the safety of your pet so do not skip this step.
Related: Easy But Effective DIY Pet Leash
Step Six: Cover the Post
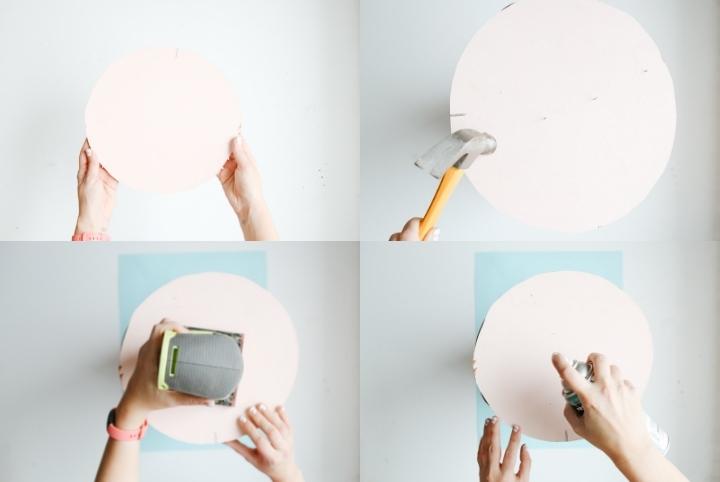
Use your jigsaw to cut a thin, 12-inch circle out of more MDF. This will serve as the cover for your post. Sand its edges down until smooth and give it a quick sand on top as well so your paint adhered better. Spray paint the cover with your colour of choice. As soon as it’s dry to the touch, nail the painted circle to the top of the post with a hammer, attaching the circle to the support we previously attached inside the tube.
Step Seven: Cover the Post with Rope
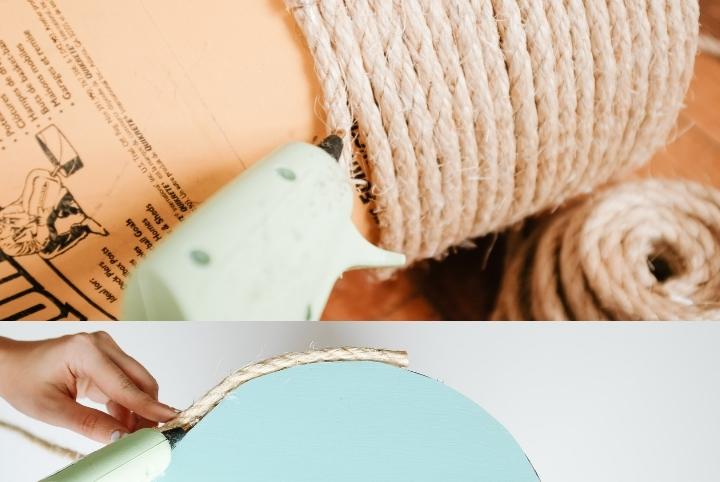
Using a hot glue gun and heavy-duty hot glue sticks, cover the entire scratch post base with the sisal rope. Hot glue dries very quickly so work section by section, securing a few inches of rope at a time to the post. And voila! Your finished result is your chic, modern cat scratch post.
Images courtesy of Maca Atencio

