
Published May 9, 2018, Updated March 18, 2021
Nothing makes me happier than creating something out of nothing. This simple, inexpensive DIY is a fabulous example. Grab those metal or plastic hangers that you never use or the ones you get for free from the dry cleaner and a little scrap fabric lying around the house.
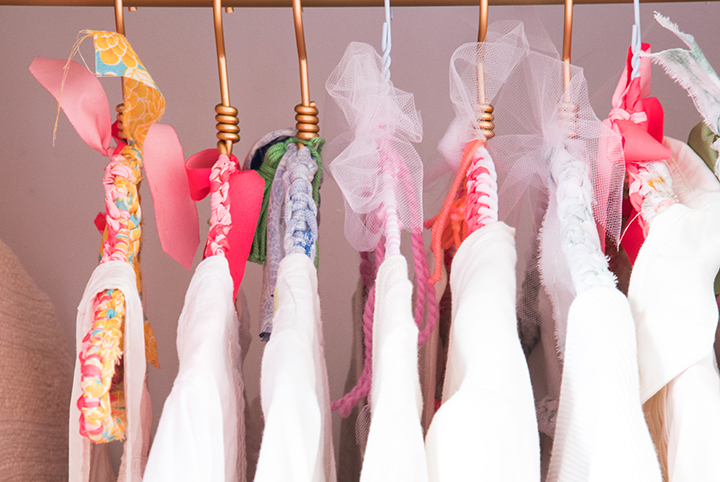
Thick, padded hangers that take up too much space are out of (closet) fashion and in are the slick, soft and slender ones that are easy on your clothes and on space. Why not make your closet a one of a kind textural dream with your own fun fabric hangers? Let’s re-imagine an old classic…
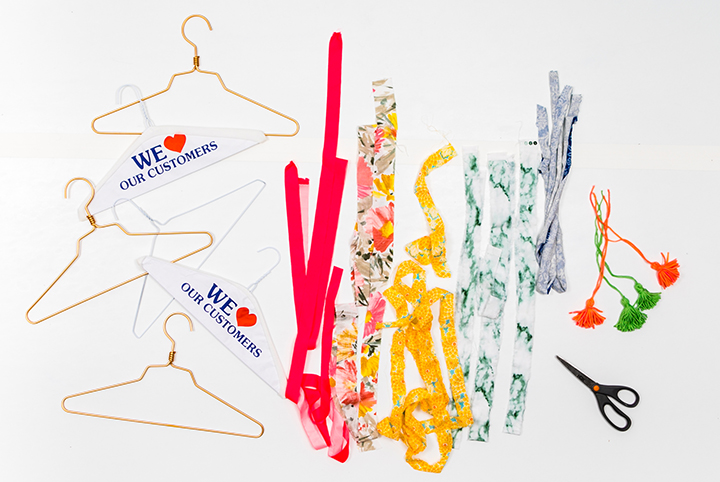
Materials Required:
- Scrap fabric cut into long strips
- Fun tassels or pom-poms (for extra flair if desired)
- Scissors
- Hangers of any kind (metal or plastic)

Step One: Collect and Cut the Fabric
The first step on the path to making your own rock and roll version of grandma’s hangers is to collect or buy some basic, fun fabric and cut it into long strips. The fabric does not need to be cut perfectly and evenly-it just needs to be cut into long enough strips to braid.
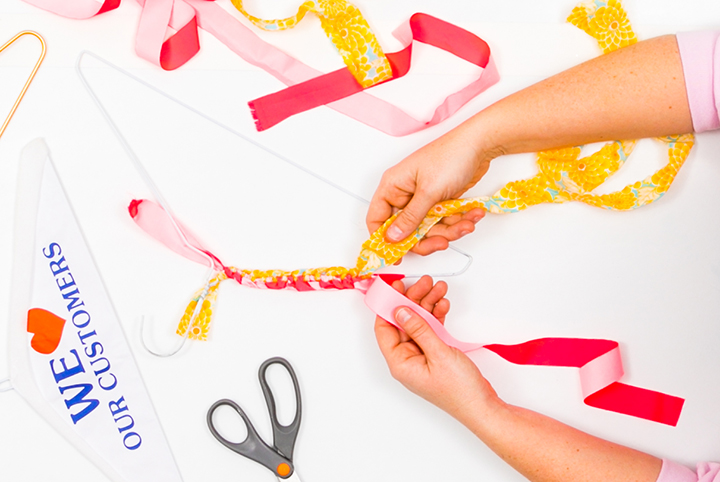
Step Two: Braid the Fabric Around the Clothes Hanger
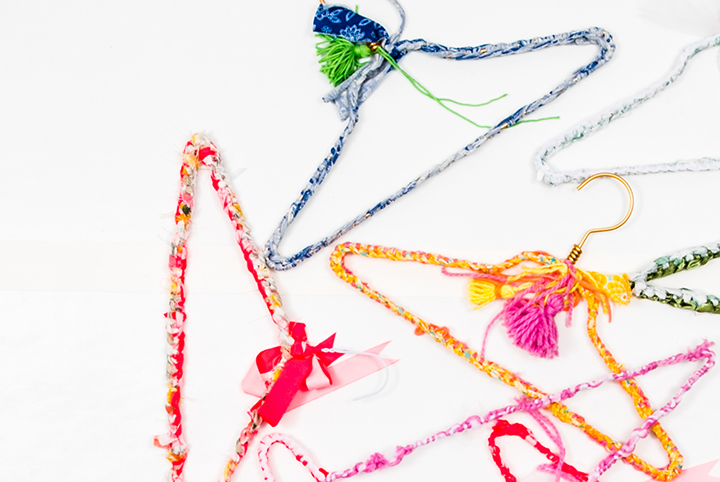
Tie three strips of fabric together at the base of the hook of the hanger and begin braiding the fabric around its wire portion.
You can use more than three strips of fabric to make a thicker hanger. Keep in mind that more fabric will give the hanger more padding and make it bulkier.
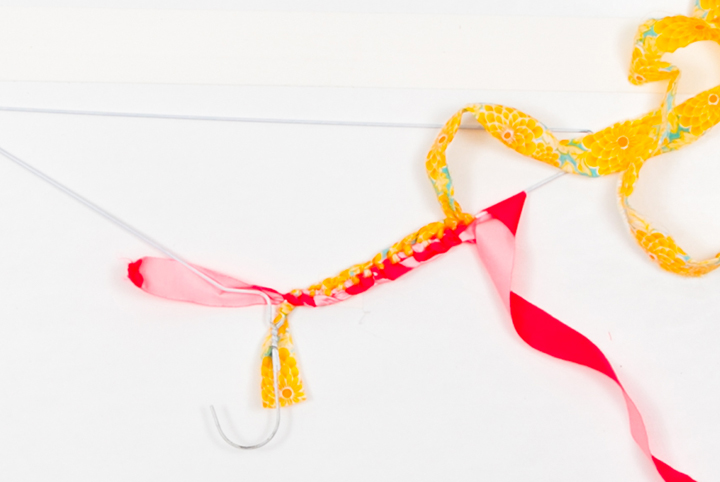
Step Three: Tie the Braid Together
Once you have made it all the way around the hanger, tie the fabric back at the top around the bottom of the hanger hook.
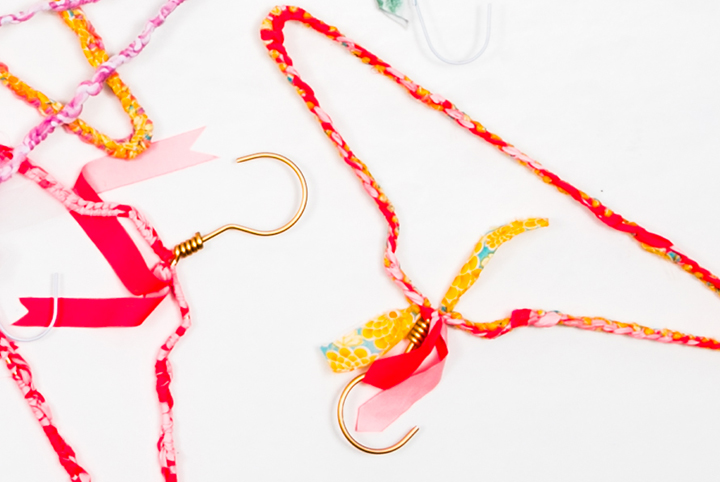
Step Four: Add a Little Extra Flair (if You Want!)
For prettier hangers, you can add a pom-pom or tassel to finish off the top of the hanger below the hook. This is optional, but I find that with a project like this going that extra mile makes them special and totally you (and that is what this is all about).
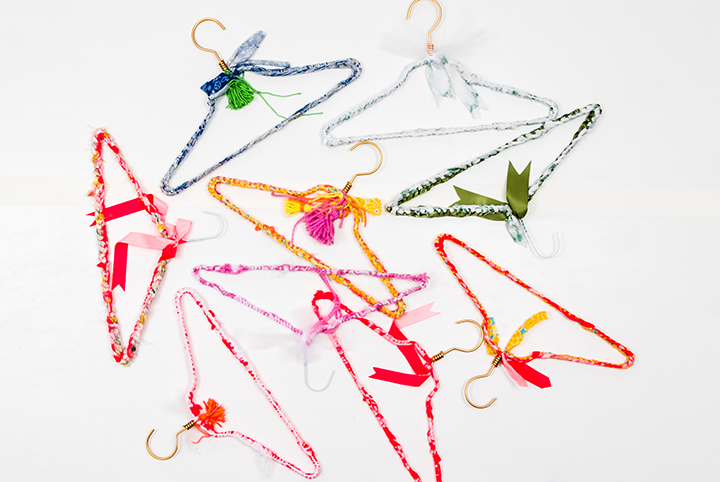
Step Five: Repeat
The idea is that you have a collection of these hangers for your closet. They look amazing in a bundle and they make such a textural statement all hung in a row. They’ll have your clothes swooning.
Trends and items of the past make their way back to us and these hangers are one of those magical items to me. I ask you to open your mind and your DIY-maker’s heart to the beauty of your own fabric braided hangers. Think of how interesting and fun your closet will look when you introduce these wonderful creations to your clothes. These are also really great to give in a bundle to your gal pals as a gift. Time to get braiding!
Images courtesy of Tiffany Pratt

