
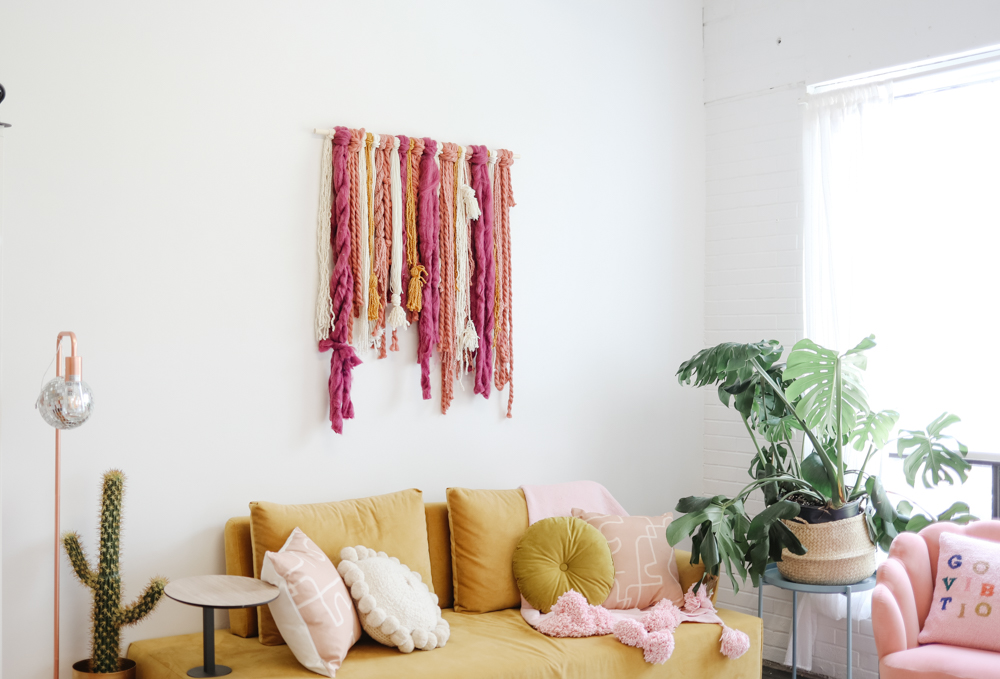
Do you have decor ideas for your home but aren’t sure where to start? This adorable statement wall art DIY project will instantly bring a cheerful and joyful vibe to your home. This DIY is super easy to create (it doesn’t require glue or weaving) and you can reuse materials you already have at home. Let’s get started…
Related: Living Room Wall Art That Makes a Huge Statement
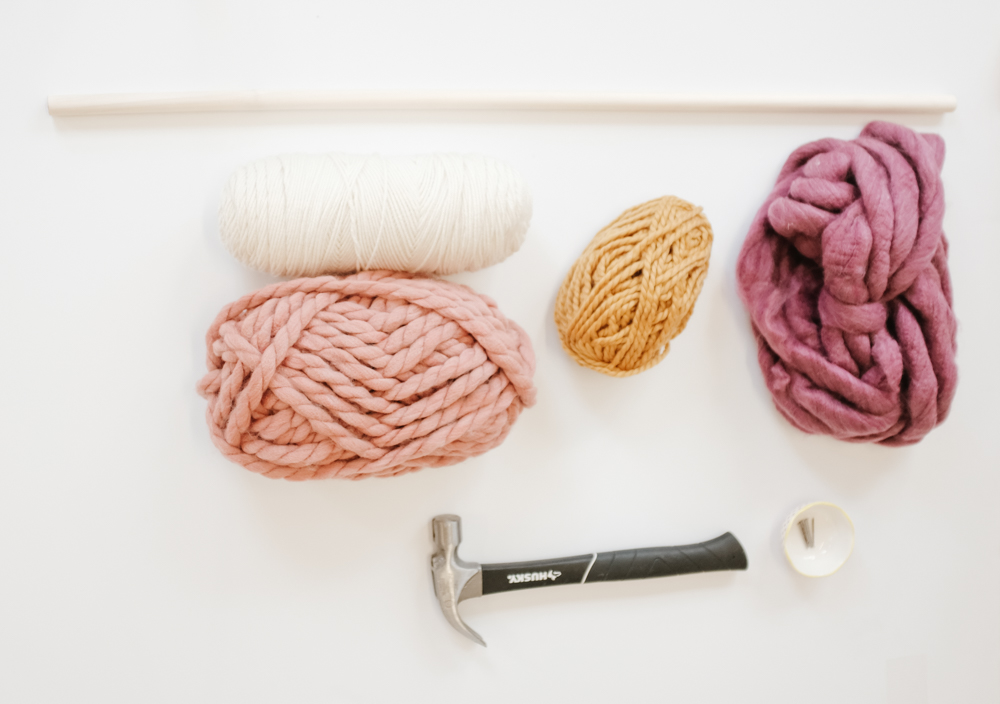
Materials Required:
- A round wooden dowel
- Yarn in different textures, colours and styles
- Rope
- Hammer
- Nails
- Scissors

Step One: Plan the Layout
Grab all of your colourful yarn and order them in the colour sequence you want to replicate on the dowel. You can mix different textures in your layout to create a balanced design.
Related: Cheerful Kids’ Room Gallery Walls That’ll Rival Adult Spaces
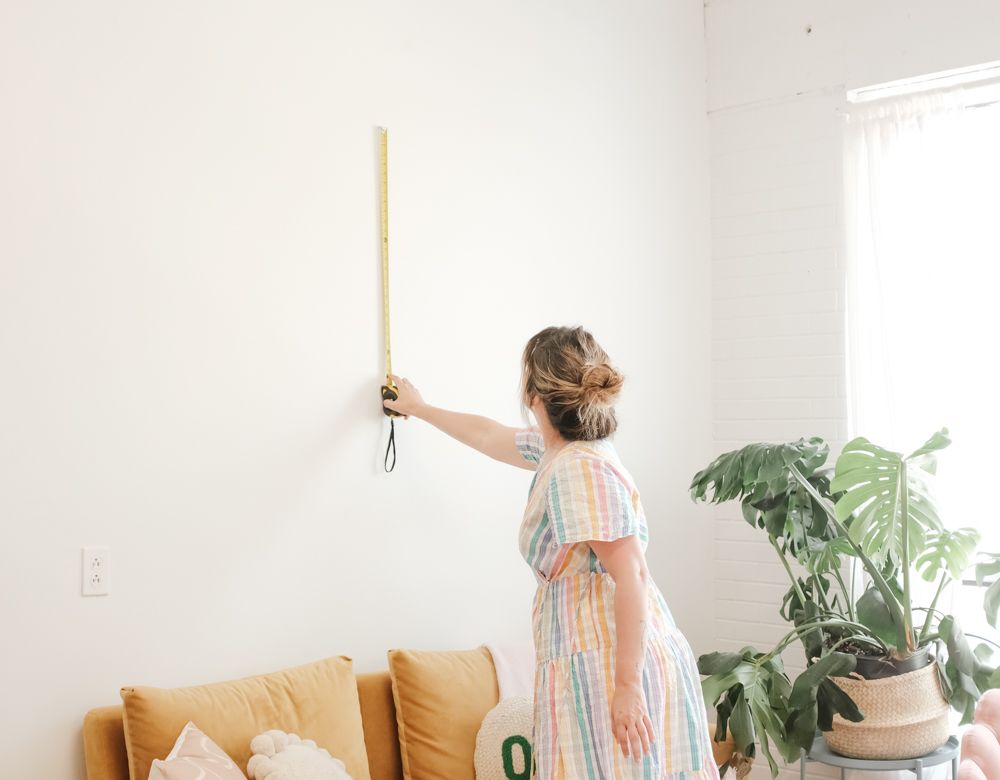
Step Two: Unpack the Yarn and Measure
As you open and unpack the yarn, calculate the length of the hanging wall art piece. You can adjust the measurements based on your wall space and how big you want it to look. This one is approximately 30 inches by 30 inches.
Related: 13 Beautiful Pieces of Artwork for Your Home for Under $100
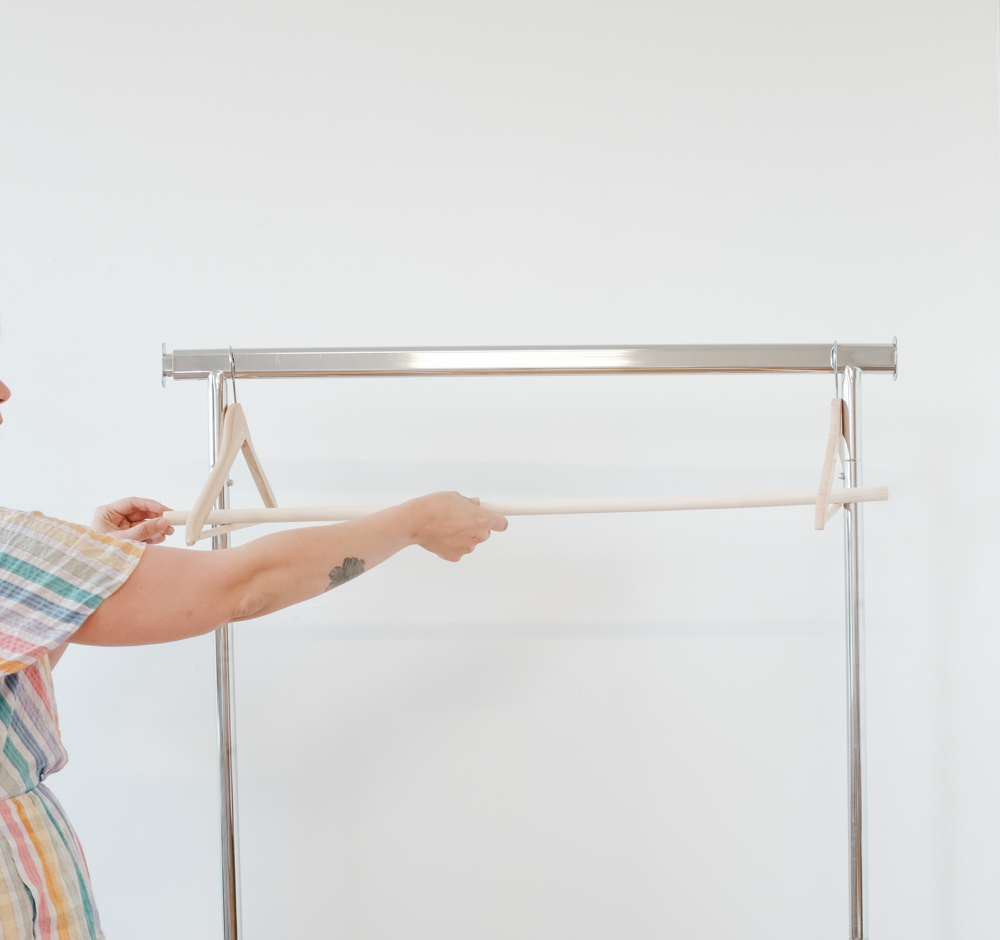
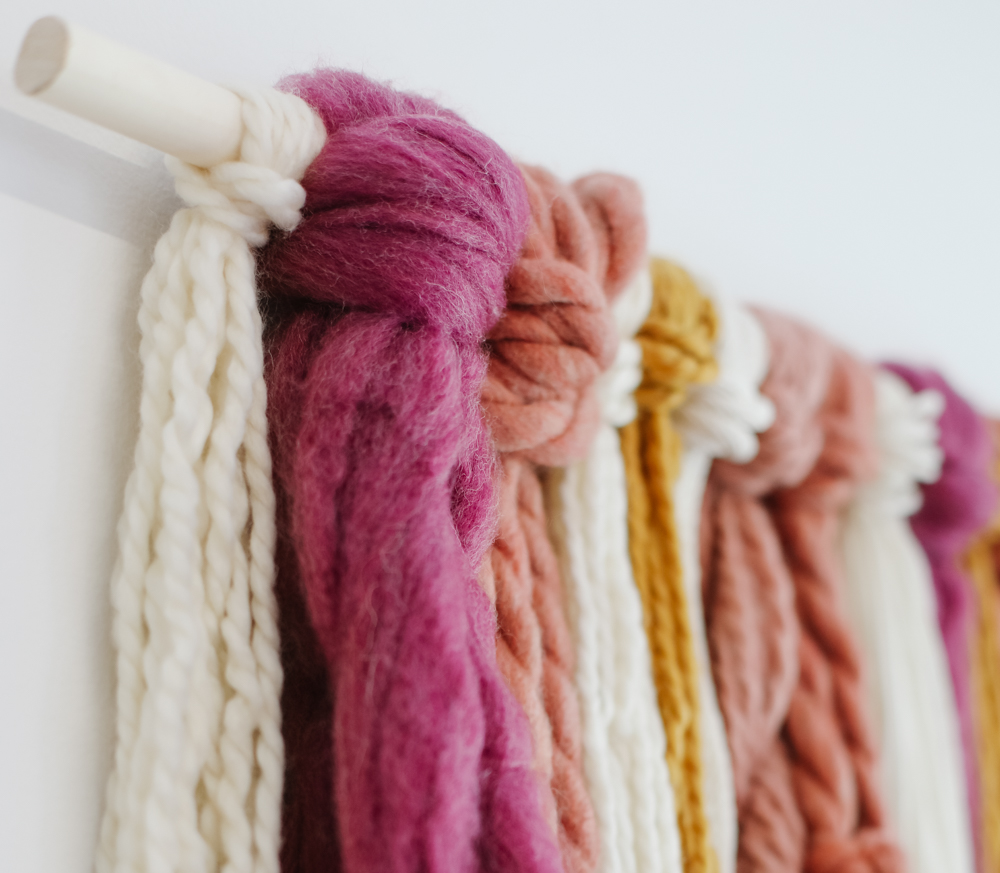
Step Three: Set Up Your Wooden Dowel
Start by hanging the dowel up using a clothing rack or something similar. This will make it easier to attach the yarn.
Related: 21 Simple Ways to Fall in Love With Your Home Again in 2021
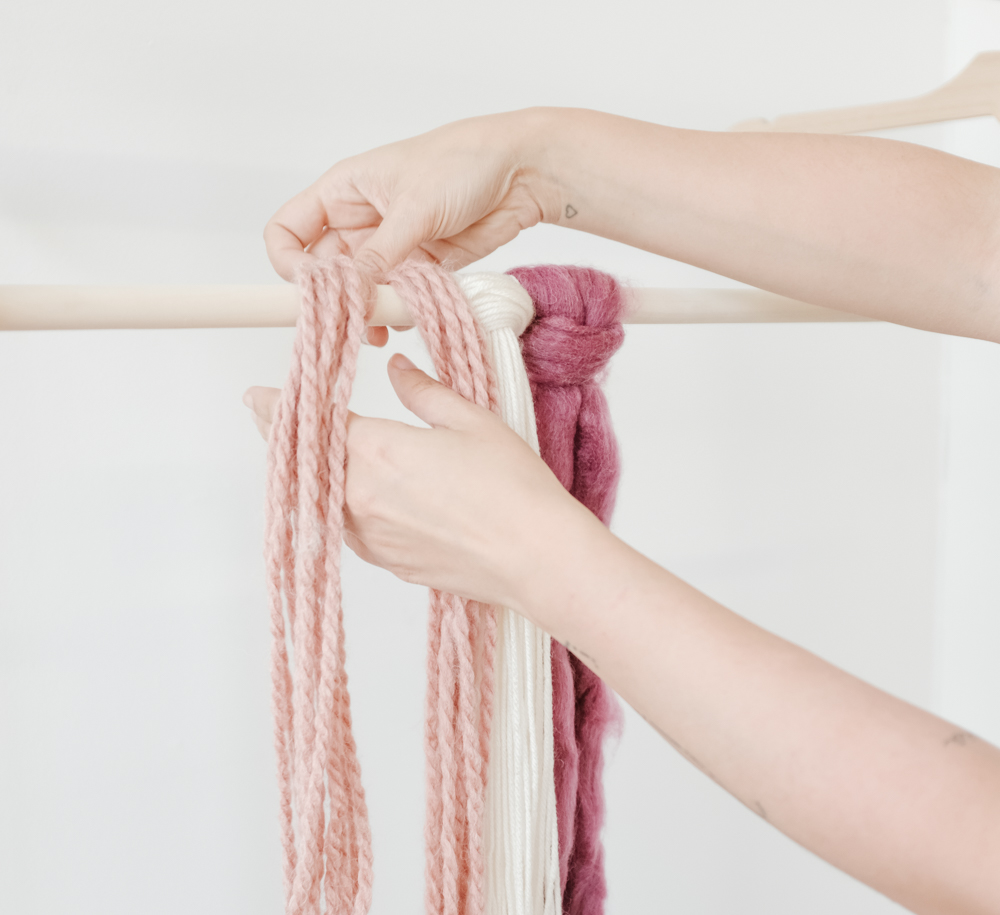
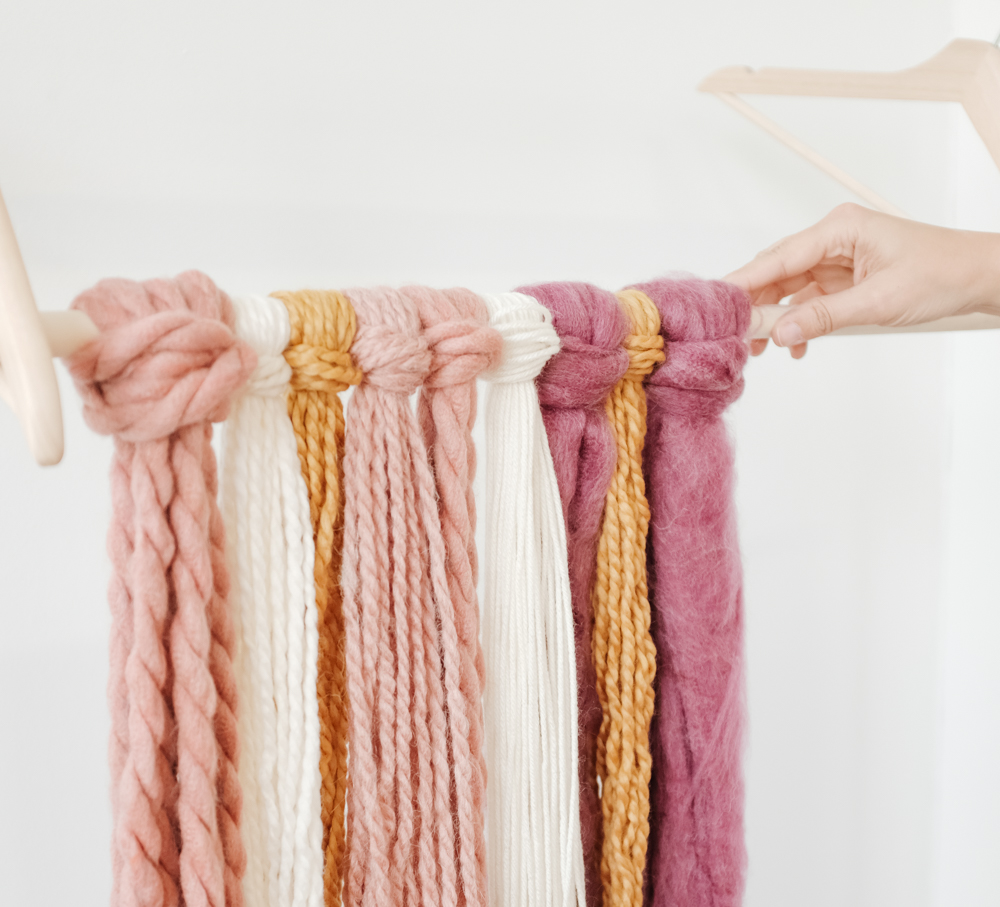
Step Four: Attach the Yarn to the Dowel
To attach each piece of yarn, first grab your yarn with double the length you would want the final piece to be, then find the middle and fold the strands in half. Now pull the loop over the dowel and pull the ends through the loop. Once you fill the entire dowel with yarn, you can add different techniques to the yarn to make it unique (we’ll show you in the next steps).
Related: DIY: How to Make Your Own Living Wall

Step Five: Make Some Single Texture Braids
Add more texture to your statement wall piece, starting with single braids. Divide the yarn into three equal sections. Let the braiding begin until you have about one inch left and then secure it with extra yarn.
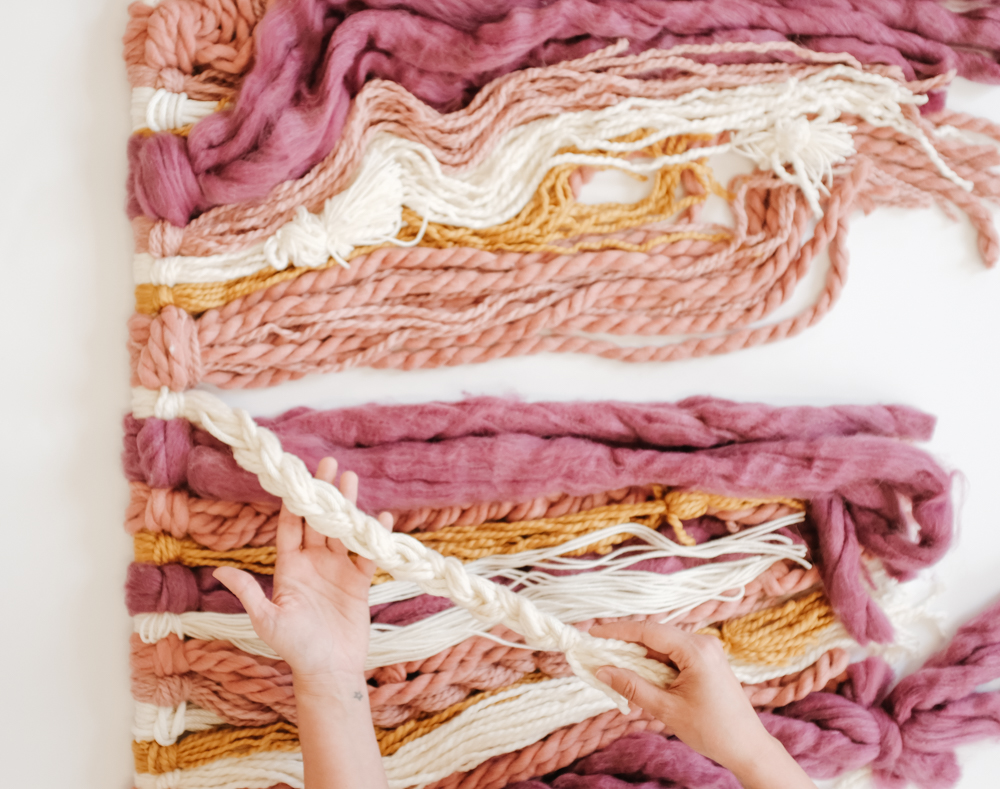
Step Six: Try Mixed Texture Braids
Braids are a fun way to add movement to this piece. Try mixing different textures, yarn colours, rope and braid them all together into one braid! Have fun with it and create bold combinations.
Related: This DIY Free-Hand Wallpaper is Your Answer to Boring Walls
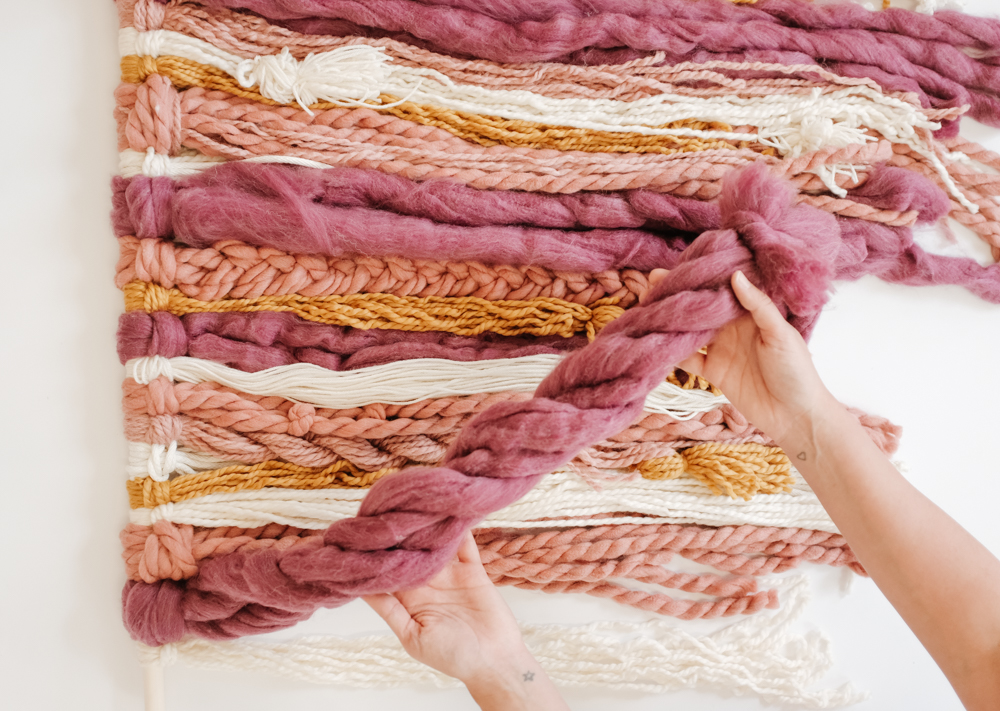
Step Seven: It’s Twist Time
Grab the longest piece of yarn and divide it into two equal sections. Twist each section individually and then twist them together. Secure both at the bottom with a knot.
Related: 15 Small Living Room Design Ideas You’ll Want to Steal
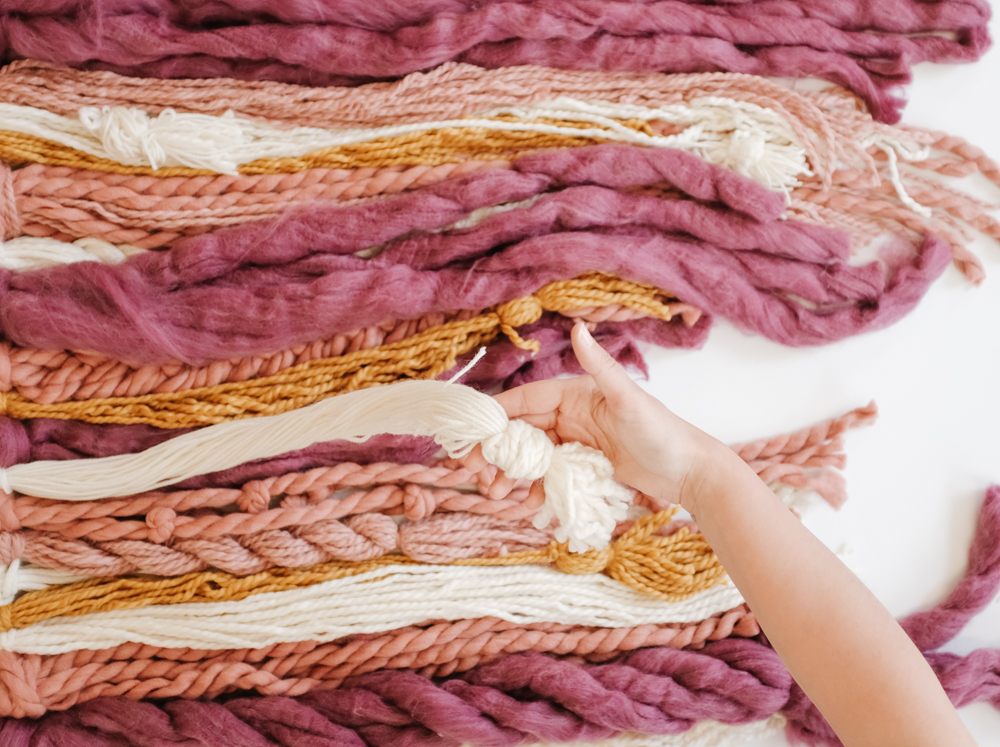
Step Eight: Add Tassels
Another technique you can try is adding tassels. You can make them by cutting a piece of cardboard and then wrapping yarn around it until you reach the fullness you want. Tie a piece of yarn around the centre of it and then pull, cutting the looped ends to form a tassel shape. To finish, tie your new tassels to the end of any loop.

Step Nine: Hang the Statement Wall Piece
Attach your wall piece to the wall using three to four nails. You can trim the ends, but having uneven ends makes this statement wall piece look so cool.
Enjoy your new modern wall decor DIY project. Cheers!
Related: 15 Minimalist Living Room Ideas That Prove Less is More
Images courtesy by Maca Atencio

