
Cane is definitely one of our favourite materials lately and it’s having a major moment. We see it everywhere: planters, furniture, chairs, creating a fresh, modern look in any space. Today, we’ll show you how you can upgrade any shelf you have at home into a very stylish, Scandinavian piece. Here we go!
Related: Why Cane Furniture is All the Rage Right Now
Related: Summery Rattan and Wicker Furnishings at Every Price Point
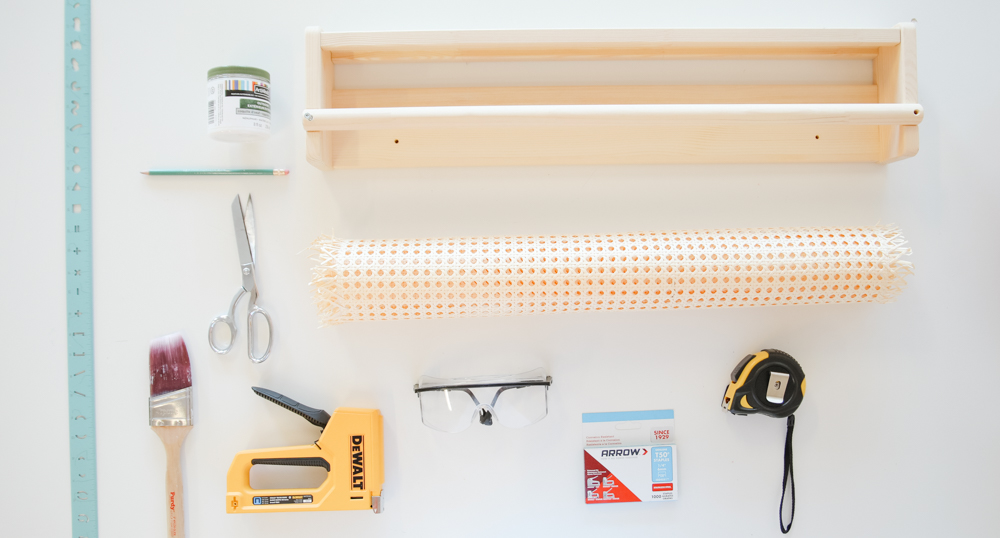
Materials Required:
- An old wooden shelf
- 1 roll of cane webbing
- Heavy duty staple gun
- 1/4″ staples
- Scissors
- Safety glasses
- Ruler
- Measuring tape
- White paint
- Paint brush
Related: 10 Boho-Chic Living Room Decorating Ideas You’ll Want to Copy
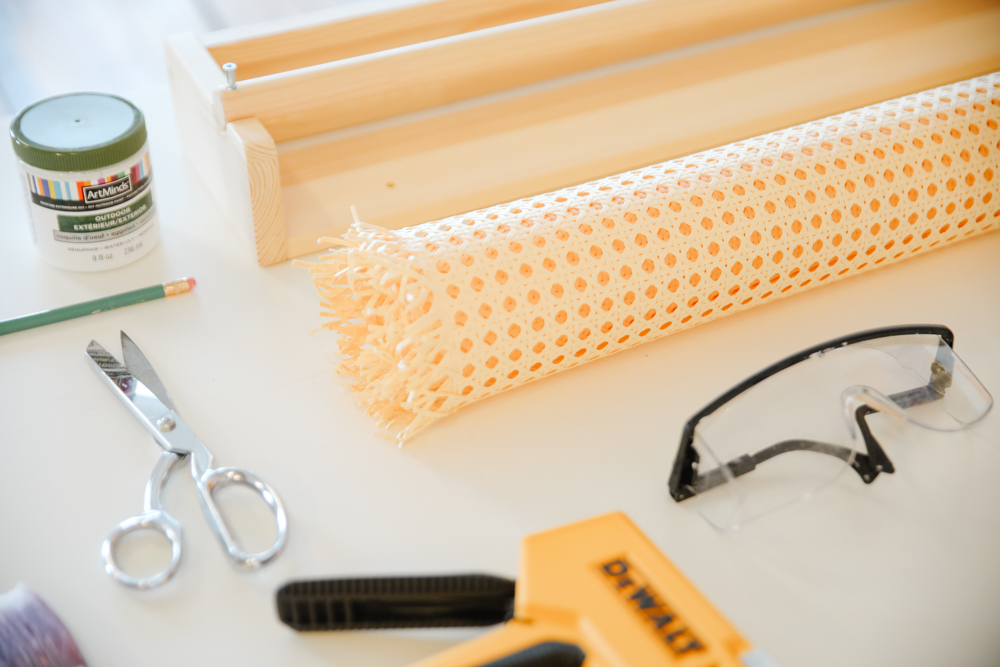
Step One: Find an Old Shelf
Get a hold of an old shelf and get ready to transform it using a roll of cane webbing and paint. Start by removing the top of the shelf so you can staple the cane through it.
Related: These Unique Cork Board Office Organizers Are Super Simple to Make
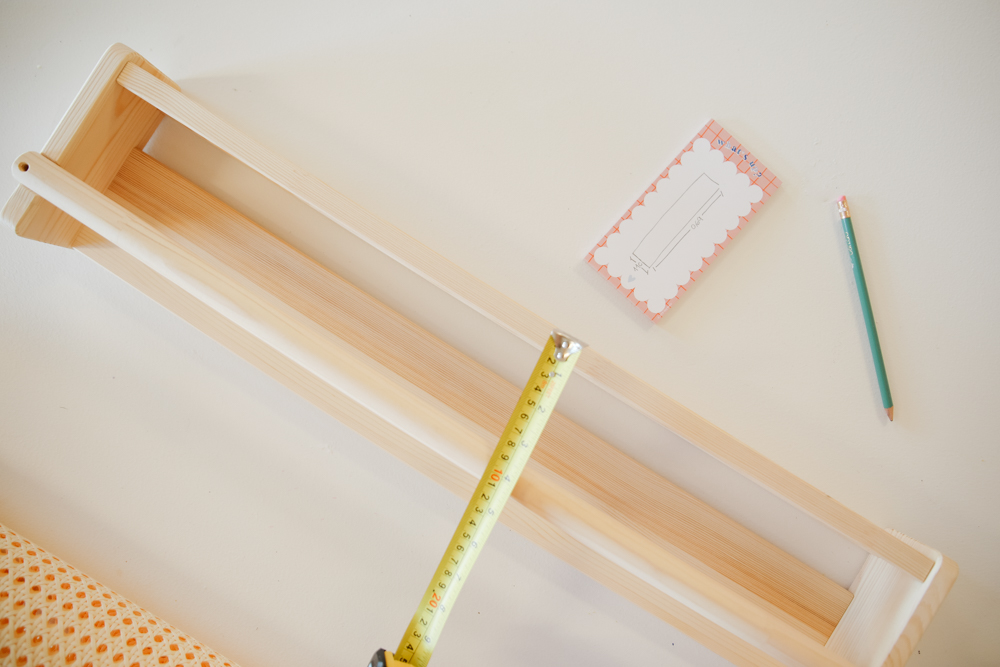
Step Two: Measure Front of Shelf
Measure the front of your shelf where you’ll place the cane. We left an extra inch on each side to center our cane once it’s stapled in the shelf.
Related: 10 Modern and Stylish Bookcases We Can’t Get Enough Of
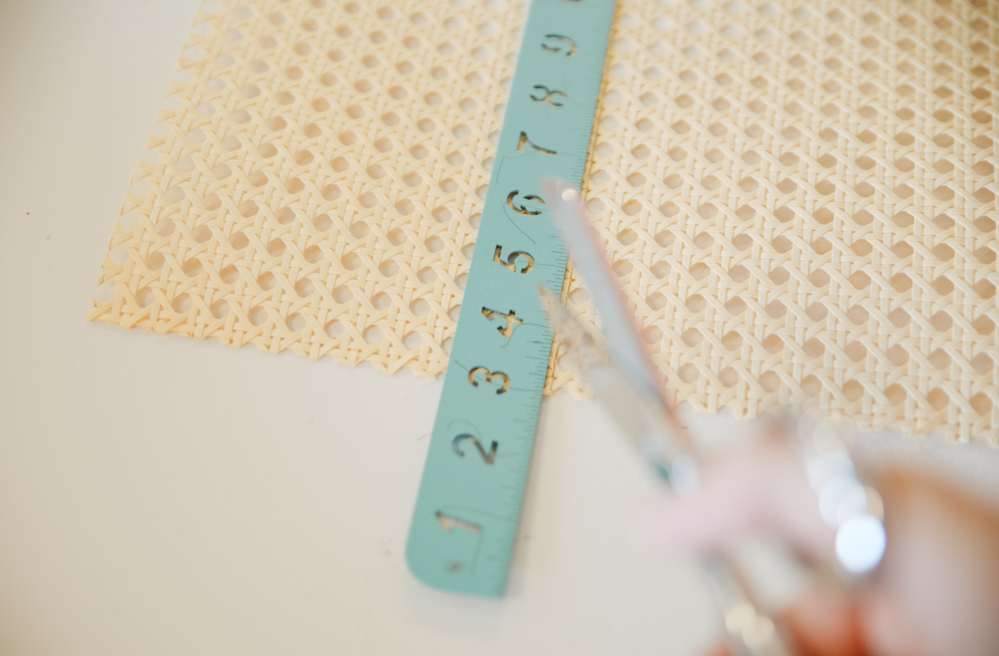
Step Three: Cut Your Cane
Grab a pencil and mark your cane webbing. Using scissors, cut it carefully so it’s the size of the front of your shelf.
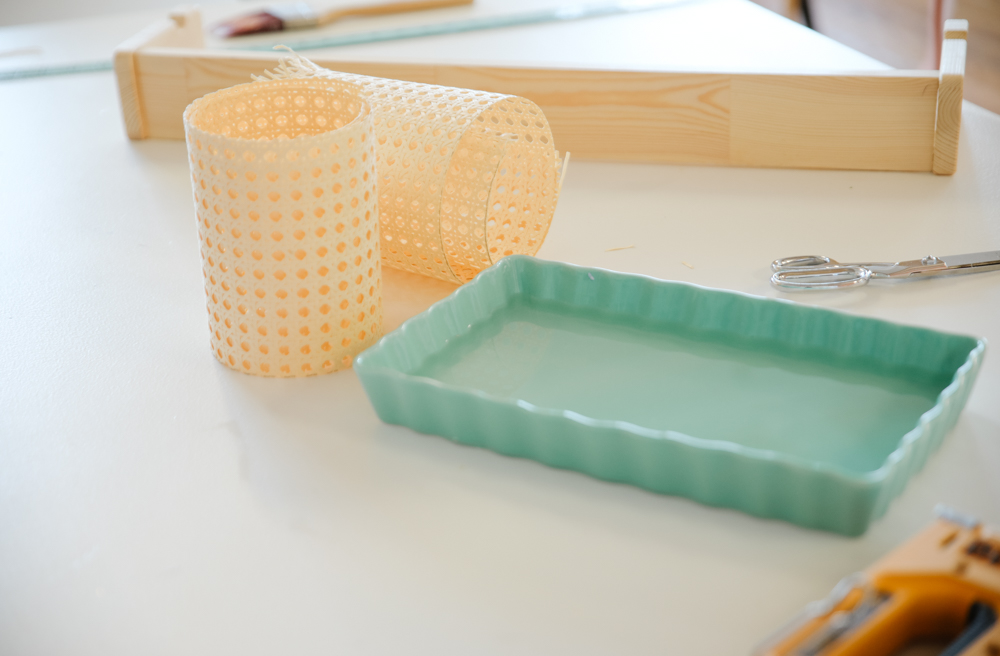
Step Four: Soak the Cane in Hot Water
Soak your cane webbing sheet in warm water for approximately 15 to 20 minutes before attaching it to the shelf and let it dry naturally. This process will allow the cane to become more flexible before installing it.
Related: Sarah Baeumler’s Five Minutes to Clean: Conquering Kids’ Shelves
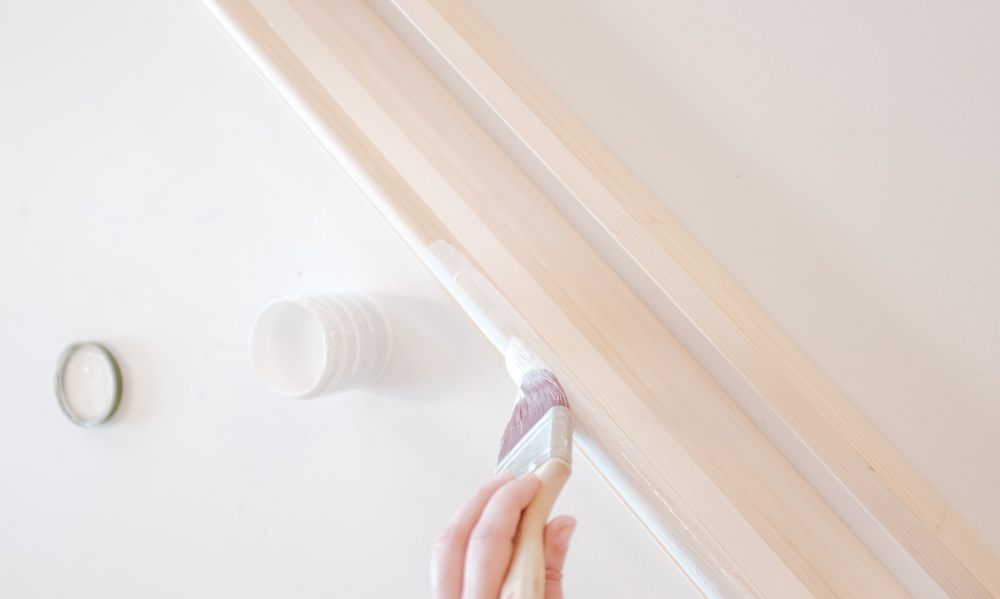
Step Five: Paint Your Shelf
While the cane dries, grab your white paint and add a coat onto your shelf. Let it dry for about 30 to 40 minutes.
Related: 17 Basement Bedroom Decorating Ideas That’ll Make You Forget You’re Underground
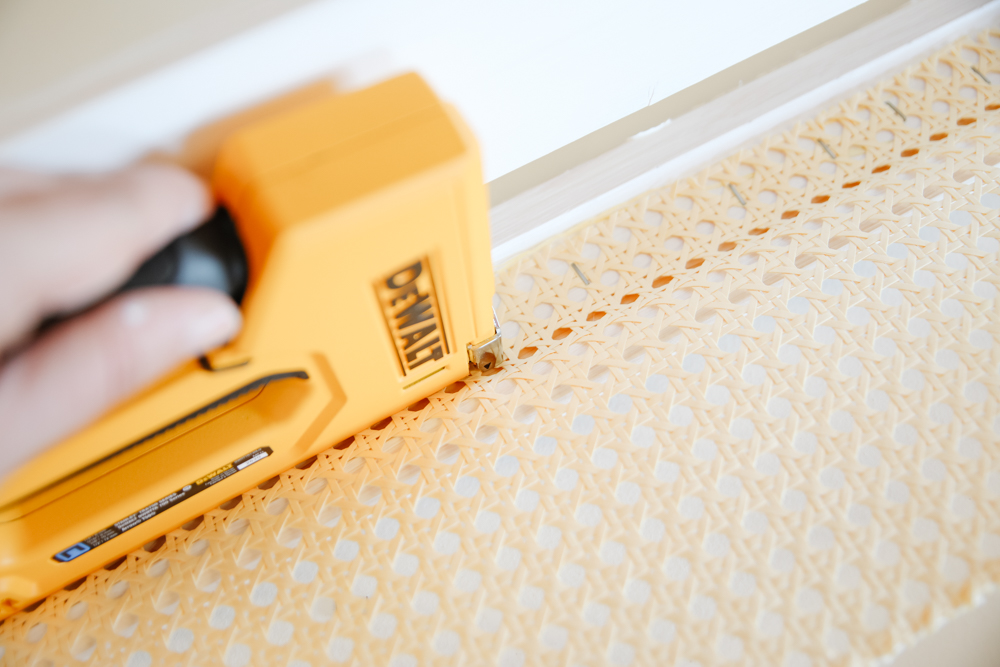
Step Six: Adding Your Cane
Grab your wood heavy-duty stapler and start attaching the cane piece to the bottom part of your shelf. Make sure you use safety goggles before you start stapling. As soon as it is secure, staple the top part.
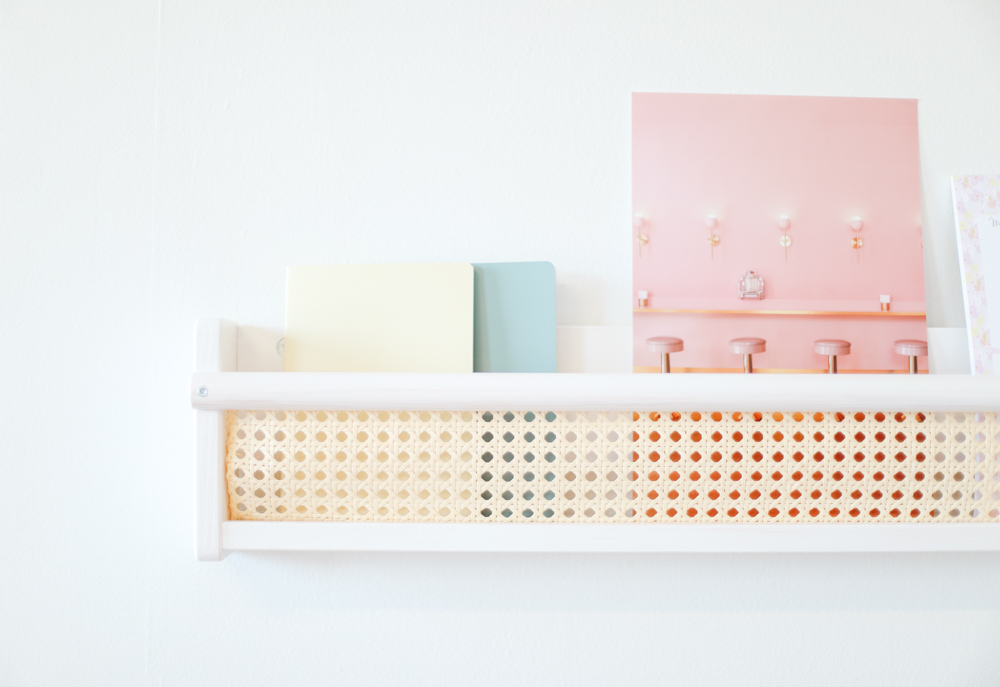
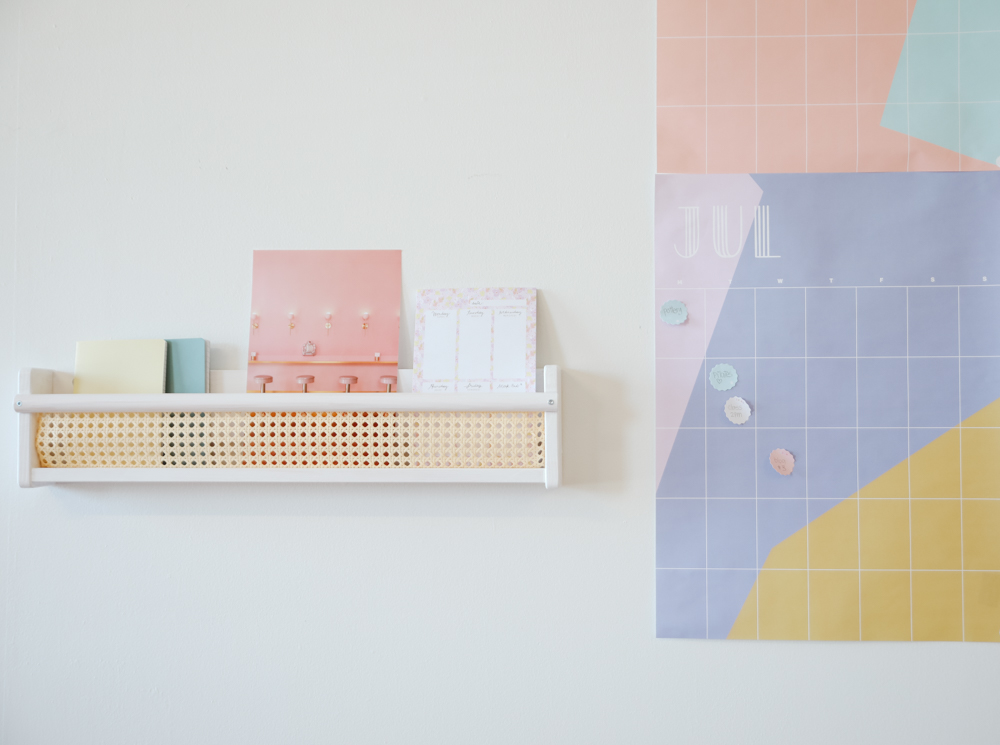
And that’s it! Your brand new stylish cane shelf is ready to welcome all of your home treasures.
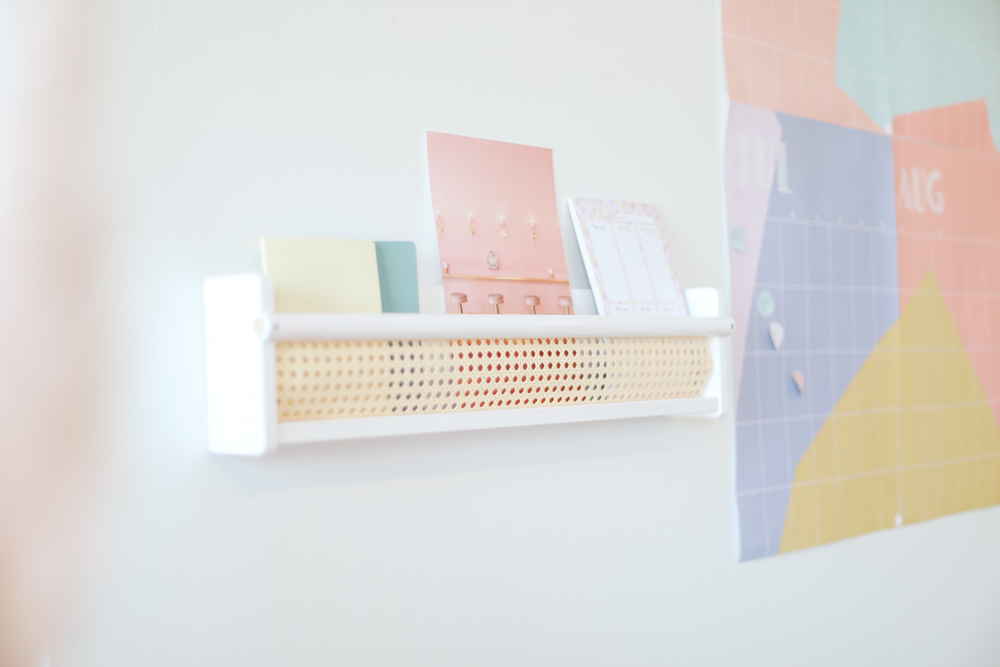
Images courtesy of Maca Atencio

