
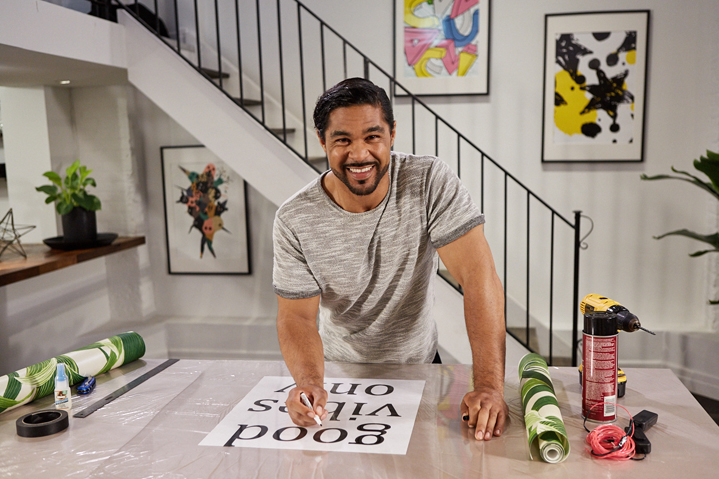
Neon light signs have become a must-have for every modern-day home, but they’re certainly not priced for every modern-day budget. Luckily, these hip and colourful home accents are easier to DIY than they seem, and with a steady hand and an easily affordable glow wire, you can craft one for your home that looks like a million bucks! Read on for the step-by-step instructions, and follow along with me as I make a DIY neon light sign in the video below:
Materials:
- Plexiglass or Acrylic sheet cut to your desired size – I went with 30″ x 30″
3′ x 9′ sections of Coloured Glow Wire or El Wire Kit (sold at party stores and online retailers) - AA Batteries to power the wire
- Paper to print out your WORD in the appropriate size
- White Board non-permanent marker
- Super Glue (tip: flexible bond, temperature resistant glue is a must)
- Painter’s Tape
- Gaffer or Electrical Tape
- Ruler
- Utility knife with new or clean blade
- Drill with 1/4″ Drill Bit
- Wallpaper: Adhesive wallpaper, remnants, low stock vintage paper – whatever inspires you!
- Spray adhesive
Instructions:
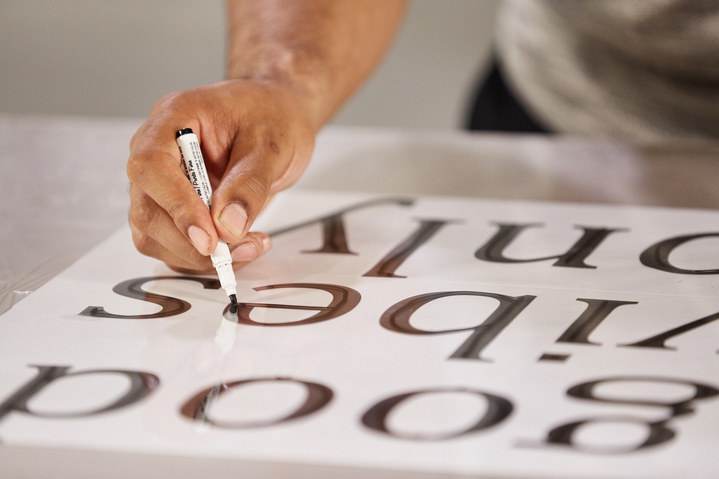
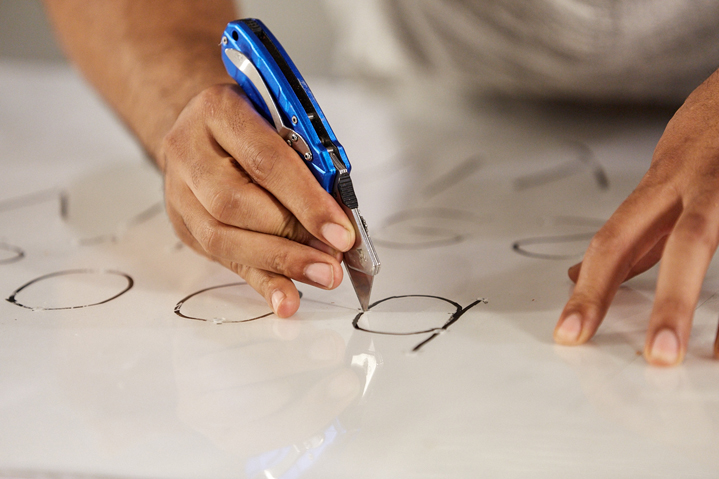
Step 1: Arrange your words flat on the table and place plexiglass on top. Begin to trace words neatly onto the plexiglass.
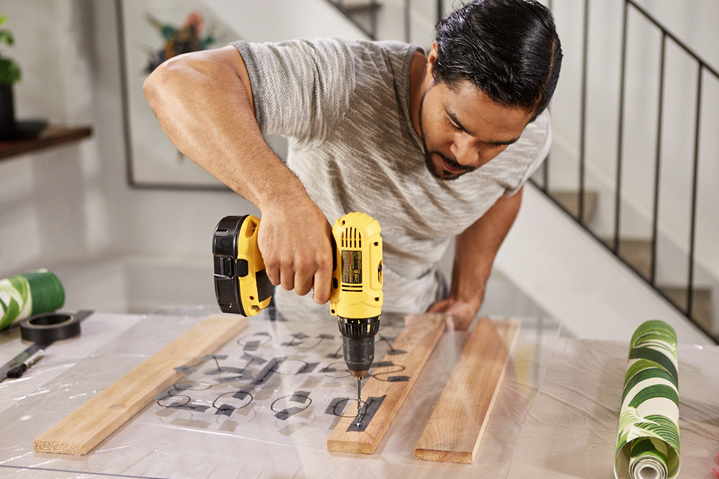
Step 2: Mark out where to drill the holes for each letter. Each letter needs a minimum of two holes, though longer letters may require three. Apply painter’s tape over each marked spot so the drill goes through the plexiglass cleanly. Flip the plexiglass over and place the scrap wood underneath so the drill can go into the wood and not the table. Drill holes into each marked spot, holding the plexiglass firmly so it doesn’t move.
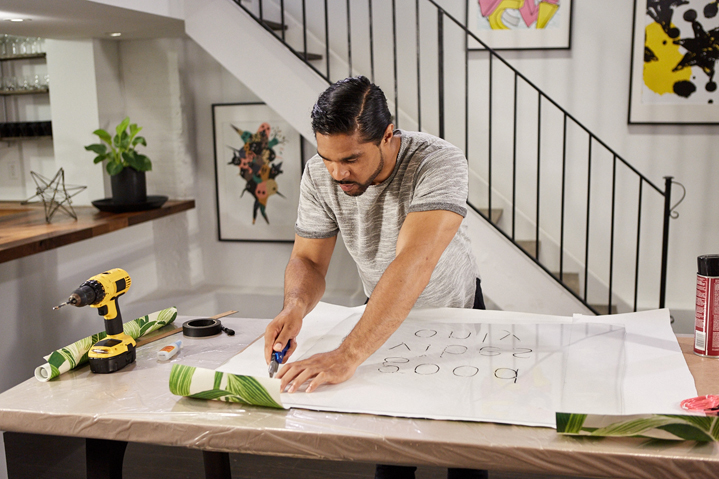
Step 3: Flip the plexiglass back over and remove all the tape and apply spray adhesive all over the plexiglass. Let it dry for two minutes. Cut the wallpaper to cover the entire piece of plexiglass and apply it to the glued side. Use a knife to trim off the excess edges.
Step 4: Use a utility knife to gently pierce through the wallpaper where the existing holes already are.
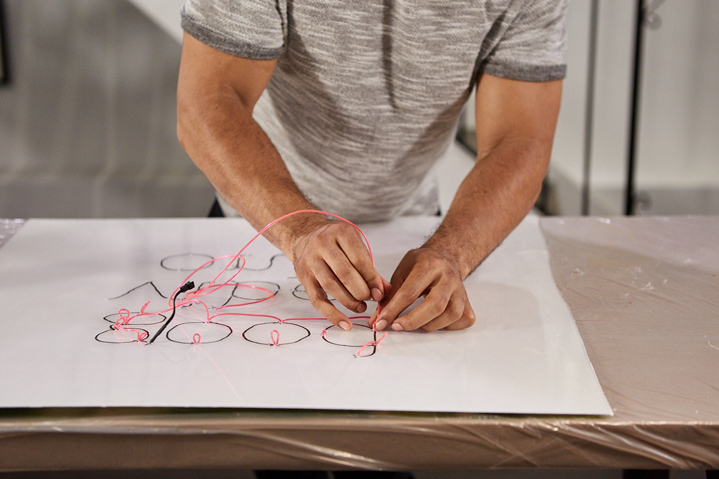
Step 5: Using El Wire start threading though the first hole of the first word, leaving the end piece sticking out to the top. Thread the wire from underneath and back up the second hole, then back through the first hole.
Leave enough slack to later form the shape of the first letter. Continue threading the remaining letters using one wire for each word.
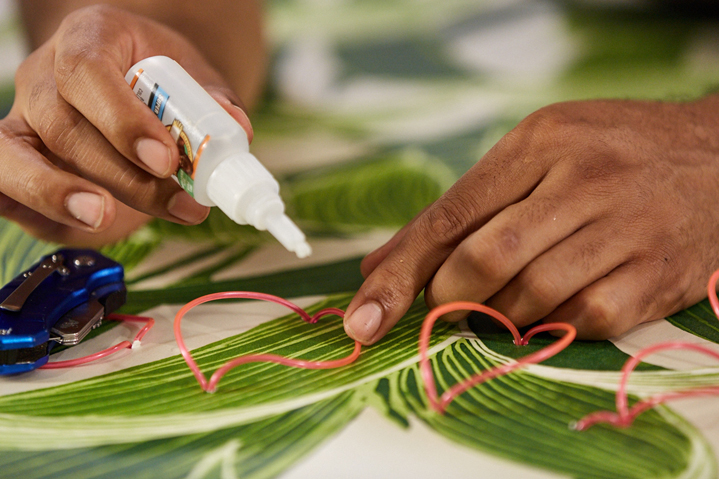
Turning the sign over to the good side, use tiny drops of superglue to tack down the wires to form the letters of each word. Hold down each letter until it’s set in place and dry.
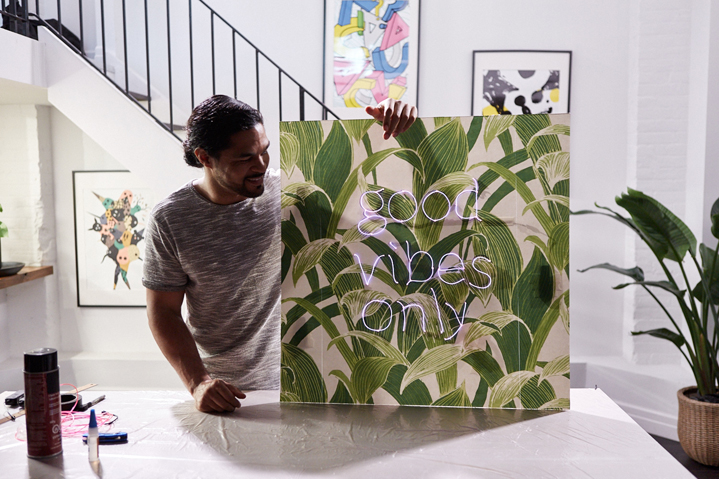
Plug in the battery pack, switch on and enjoy!
Images courtesy of Dale Wilcox Photo

